Configure Advanced Settings: Project Documents
Things to Consider
Required User Permissions:
'Admin' on the project's Documents tool.
Steps
Document Settings
Navigate to the project's Documents tool.
Click the Configure Settings
 icon.
icon.Under Document Settings, click one of the following to configure or update your settings:
General
Permissions
General
Under Document Settings, click General and review the following settings:
Documents and Folders Private by Default:
Click Yes if you want new files and folders to be marked as Private automatically.
ORClick No if you want new files and folders to be visible to all users with 'Read Only' or higher permissions to the Documents tool.
Note: You can manually set individual files and folders to Private at any time.
Enable Deletion of Multiple Documents:
Click Yes if you want to enable deleting multiple documents.
ORClick No if you do not want to delete multiple documents.
Import Options: You can email files into the Documents tool by sending them to the tool's inbound email address. The email address is listed in the same section.
Note: Any files attached to an email sent to this address will be added to the 'Emailed Documents' folder.Copy Folder Structure: If you want to copy the folder structure from a current project, select a current project from the drop-down menu of 'Select a current Project to copy its folder structure'.
Note: Both files and folders are copied over to the project. See Upload Files or Folders to the Project Level Documents Tool.Download Tools:
Procore Drive: Procore Drive is an application for Windows that you can use to upload and manage files for the Documents tool.
Procore BIM Plugin: You can install the Procore BIM Plugin on a Windows computer running your design software. For instructions, see Download & Install the Procore BIM Plugin.
Click Save Changes.
Permissions
Note: This page is only available to users who also have 'Admin' permission to the project's Directory tool.
Navigate to the project's Documents tool.
Click the Configure Settings
icon.Click Permissions.
To change a user's permission level for the Documents tool, click the circle
 icon in the respective row. Once the permission is updated, it will be marked as
  icon.
icon.
Note: If a row is gray and unclickable, it means that the user has already been assigned the permission. You can only assign permissions to a new user.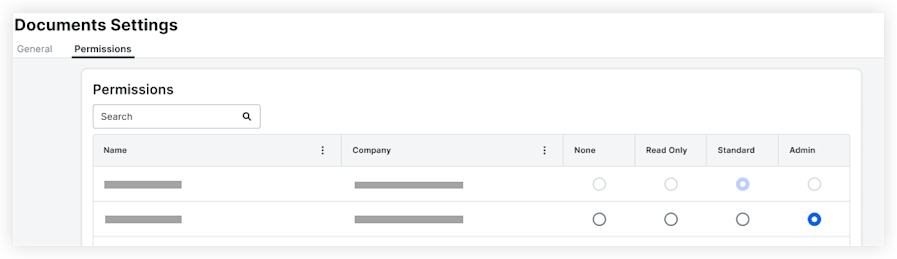
Note: The user is either a Procore Administrator or has been granted permissions to the Procore tools on this project using a permissions template (see What is a permissions template?). To change the user's permission level for this tool, see Change a User's Permissions in the Project Directory.
See Also
Loading related articles...