Mark Up a Drawing
Aspectos a tener en cuenta
Permisos de usuario requeridos:
Para agregar anotaciones personales a un plano, Permisos de "Solo lectura" o superiores en la herramienta Planos.
Para publicar anotaciones, Permisos "Estándar" o "Administrador" en la herramienta Planos.
Información adicional:
Cualquier marca que agregue se agregará automáticamente a su capa personal. Para que las anotaciones sean visibles para cualquier usuario con permisos para ver planos en el proyecto, debe publicar sus anotaciones personales en la capa Publicada. Los usuarios con permisos "Estándar" o "Administrador" pueden publicar sus anotaciones personales.
Si previamente agregó anotaciones a un plano existente en Procore y luego cargó una revisión más nueva de ese mismo plano, todas las anotaciones (excepto los croquis) de la revisión anterior se conservarán y las heredará el nuevo plano. Debería ver automáticamente todas las mismas anotaciones personales y publicadas encima de la nueva revisión.
Video
Steps
Navigate to the Drawings tool.
Click Open next to the drawing you're going to mark up.
Click the Markup icon in the upper right of the page.
Tip! Be sure you are showing your personal layer! Click Filter and make sure the Personal layer is visible.
Mark up the drawing using the tools in the toolbar (detailed below) and using the copy, duplicate, and link features, which are accessible after clicking on the markup.
When you have finalized a markup, and you are ready to make it visible to your team, Publish the Markups by clicking on the markup and choosing Publish from the menu that appears.
Note: Not all markups are able to be edited after publishing. If you want to redo a published markup, you will need to Delete the Markup, and add the markup again.

Toolbar
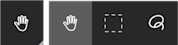
Select / Multi / Lasso: Pan around the drawing by clicking and dragging on an image with the Select tool. Select multiple markups to publish, edit, resize, or delete using the Multi Select or Lasso tools.
Pen / Highlight: Draw freehand shapes on the drawing using either Pen or Highlight. You can change the color and thickness of the line using the Color and Line Width options in the toolbar.
Tip! Hold the 'Shift' button on your keyboard if you want to draw a straight line.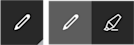
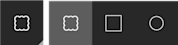
Cloud / Box / Ellipse : Draw a shape to highlight an area or link an item to. See Link Related Items on a Drawing. You can change the color, thickness, and opacity of a shape from the Color, Line Width, and Fill options in the toolbar.
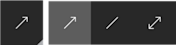
Arrow / Line / Double Arrow: Draw a line or an arrow to point to an area or link an item to. You can change the color and thickness of the line or arrow from the Color and Line Width options in the toolbar. See Link Related Items on a Drawing.
Text: Add a text box to add information or comments. Click inside the box to begin typing. You can adjust the font size by selecting a size number from the drop-down menu, or change the color from the Color option in the toolbar. Click and drag the corners of the text box if you want to adjust the size of the box.

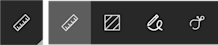
Distance / Area / Freehand / Calibrate: After adding a calibration to your drawing using the Calibration tool, use the other measuring tools to measure a distance, area, or curved or poly shape. See Add Measurements to a Drawing.
Drawing: Add a square or circle to add a link to another drawing sheet to.
Tip! To draw a circle over the desired area, start at the upper-left corner where the edges of the left and top sides of the circle would meet. Hold the Shift key (to create a symmetrical circle), left-click and drag to the bottom right of the circle, and release the left-click.
Pins: Click to select different pin markups to link items to specific areas of the drawing.
Note: You will only see pin markup options for the tools that are currently enabled in the project. For example, if your organization does not use the Coordination Issues tool, you will not see the 'Issue' pin in the markup toolbar.
Click the Photos pin to link a photo to an area of the drawing. See Add Photos to a Drawing.

Click the Punch pin to link a punch item to an area of the drawing. See Add Punch List Items to a Drawing.

Click the Issue pin to link a coordination issue to an area of the drawing. See Add Coordination Issues to a Drawing.

Click the Obs pin to link an observation to an area of the drawing. See Add Observations to a Drawing.

Color: This additional tool will appear when you select a drawing markup tool that allows you to modify the color. Select which color to use on a markup from this menu.

Fill: This additional tool will appear when you select a drawing markup tool that allows you to modify the fill. Select the desired fill transparency of a markup.

Line Width: This additional tool will appear when you select a drawing markup tool that allows you to modify the width. Specify the width of a single line or border of a shape.

Next Steps
See Also
Loading related articles...