Apply Advanced Forecasting Curves

Background

Using the forecasting curves with the 'Procore Standard Forecast' view, you can view your construction project's monthly cost projections by spreading the 'Projected Cost to Complete' column value across a time period that you define. Your company's Procore Administrator can also create a customized forecast view to define which column value to spread using these curves:

  • Front-Loaded. Select this menu option so the spread shows more spending at the beginning of the timeline and less spending at the end of the timeline.

  • Back-Loaded. Select this menu option to adjust the spread to show less spending at the beginning of the timeline and more at the end of the timeline.

  • Bell. Select this menu option to adjust the spread to show less spending at the beginning and end of the timeline and more spending in the middle of the timeline.

  • Linear. Select this menu option to evenly spread the amount in the 'Projected Cost to Complete' column over the selected timeline.

  • Manual. Select this menu option to update forecast amounts manually.

Examples of each curve are detailed below.

Things to Consider

  • Required User Permissions:

    • 'Standard' level permissions on the project's Budget tool.

  • Additional Information:

    • This forecasting view supports Monthly forecasting. Quarterly forecasting is not currently available.

 Tip

How does Procore calculate the advanced forecasting curves? To learn more, see How do Procore's 'Advanced Forecasting' curves distribute 'Projected Cost to Complete Amounts' amounts?
Steps

  1. Navigate to the project's Budget tool.

  2. Click the Forecasting tab.

  3. Select the forecasting view from the View menu. In this example, we selected the 'Procore Standard Forecast' view. However, your Procore Administrator may create customized views for your environment. See Set Up a New Forecasting View.

  4. Apply a curve using one (1) of these options:

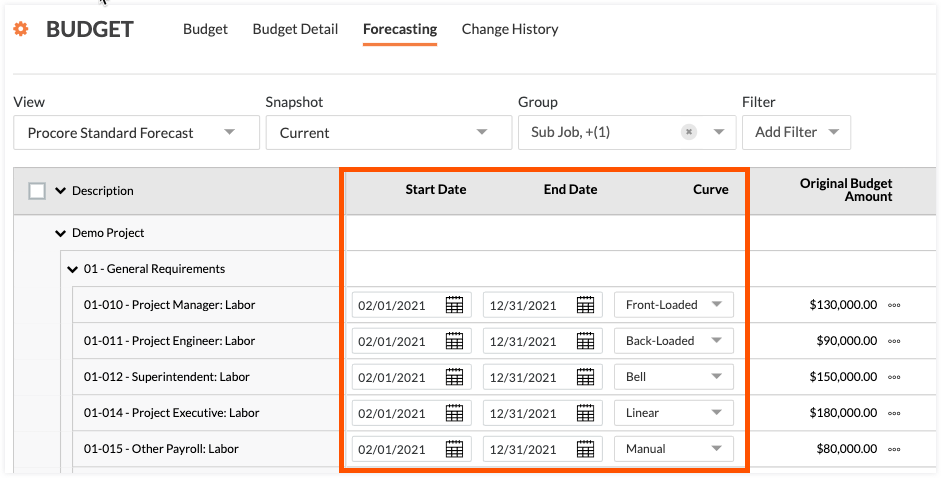
    1. To apply a curve to a single line item, do the following:

      1. Start Date. Select a start date for your forecast period.

      2. End Date. Select an end date for your forecast period.

      3. Curve. Select the curve to apply to your forecast period. Then scroll to the right side of the page to see your forecast for the specified period.
        Forecasting Line Items

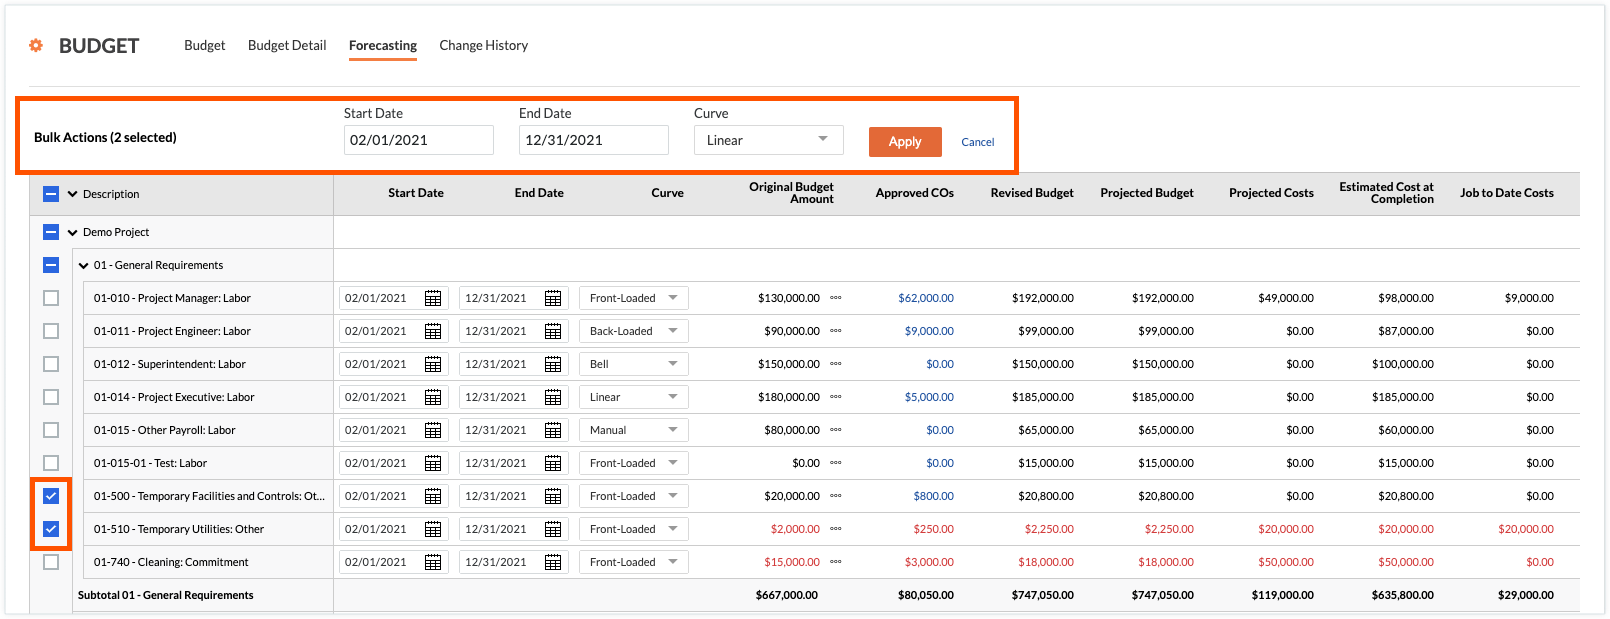
    2. To apply a curve to your line items in bulk, do the following:

      • To select all of the line items in the project, mark the checkbox next to the Description field.

      • To select one or more line items, mark the checkbox(es) next to the desired line items. Then, click Edit Values above the table and configure the following options in the 'Edit Values' side panel:

        1. Start Date. Select a start date for your forecast period.

        2. End Date. Select an end date for your forecast period.

        3. Curve. Select the curve to apply to your forecast period. Then scroll to the right side of the page to see your forecast for the specified period.

        4. Apply. Click this button to apply the specified curve to the line items you selected.
          Forecasting Bulk Actions

Examples

The examples below detail each advanced forecasting curve:

Front-Loaded Curve

Example

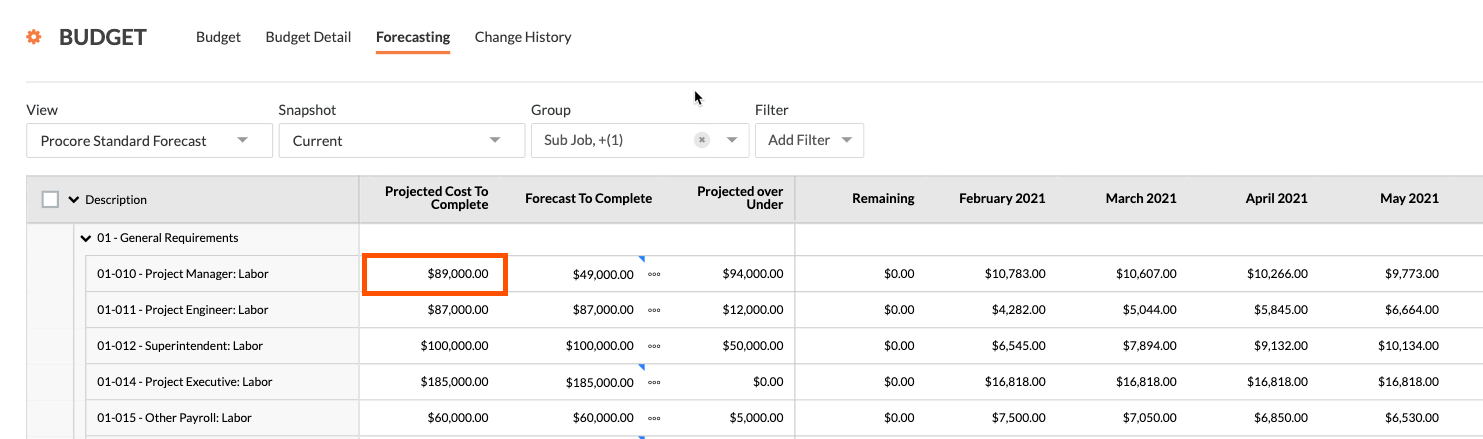
In the first line item of the example budget, the 'Front-Loaded Curve' option is selected so that the spread shows more spending at the beginning of the timeline and less spending at the end of the timeline. As shown below, the value in the 'Projected Cost to Complete' is $89,000.00.

Forecast Projected Cost To Complete 1

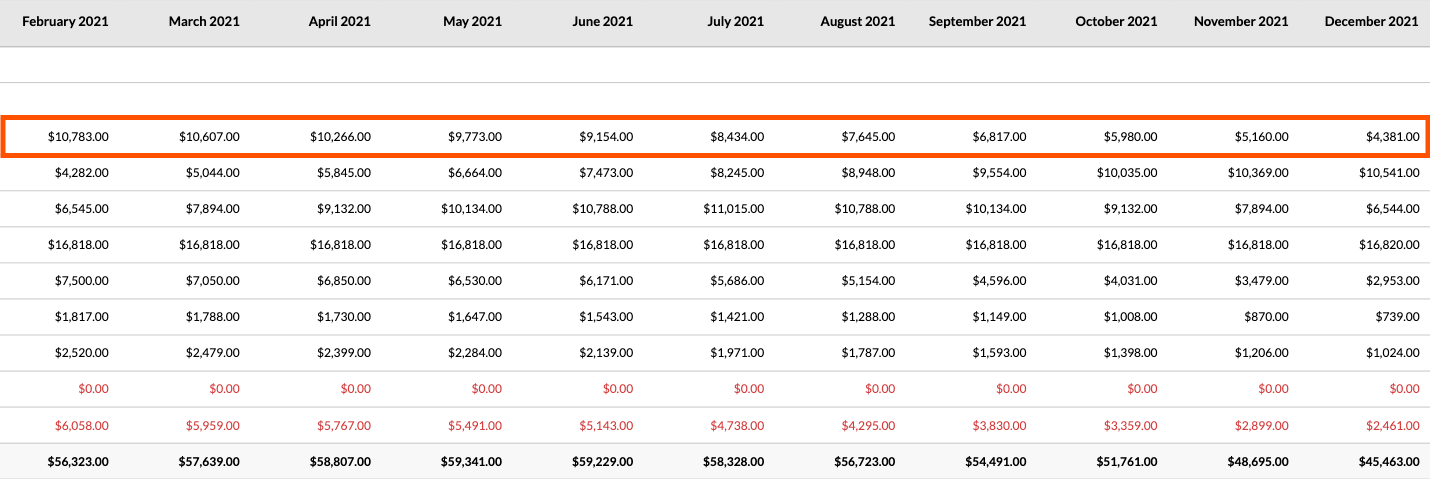
When you scroll to the right, notice how the front-loaded curve spreads that $89,000.00 over the 10-month forecast period. As shown below, this spread shows more spending at the beginning of the timeline and less spending at the end of the timeline.

Forecasting Front Loaded Curve 1

Back-Loaded Curve

Example

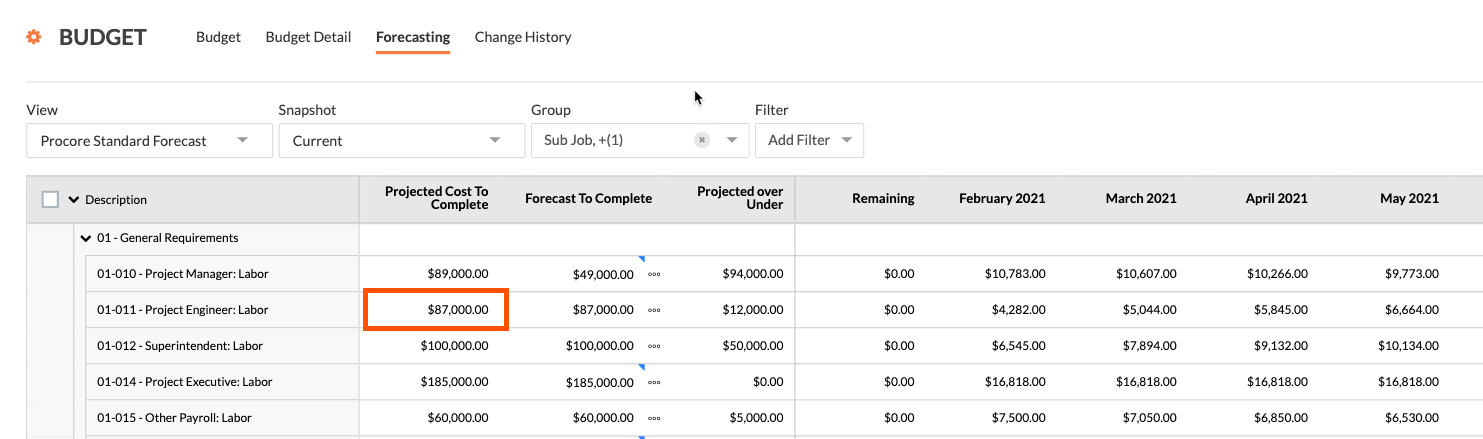
In the second line item of the example budget, the 'Back-Loaded Curve' option is selected to adjust the spread, showing less spending at the beginning of the timeline and more at the end of the timeline. As shown below, the value in 'Projected Cost to Complete' is $87,000.00.

Forecast Projected Cost To Complete 2

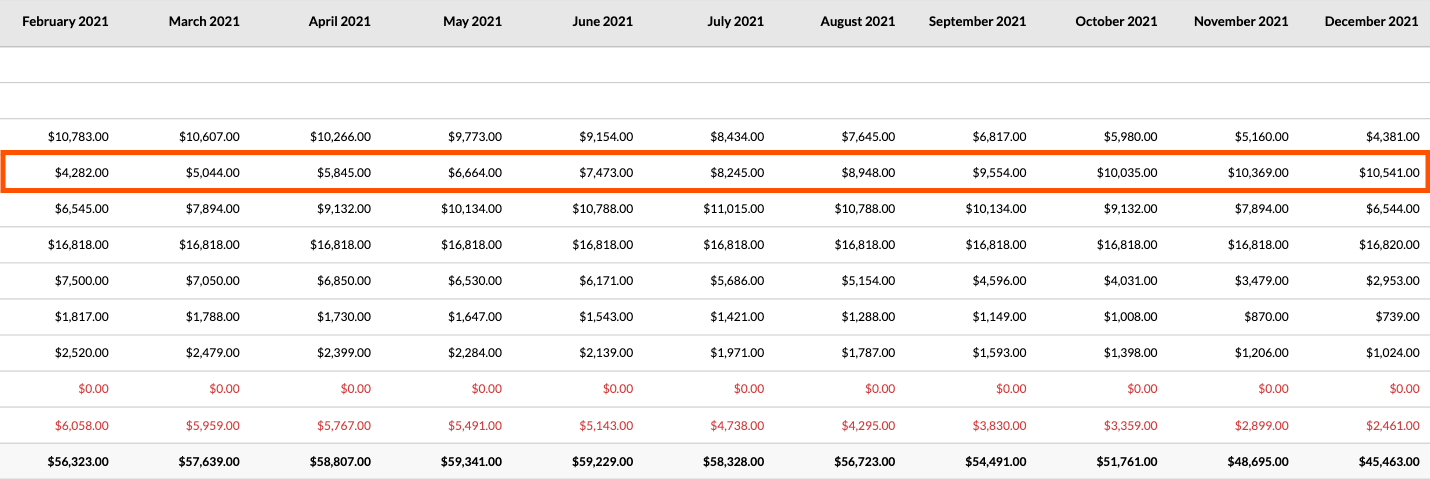
When you scroll to the right, notice how the front-loaded curve spreads that $87,000.00 over the 10-month forecast period. As shown below, this spread shows less spending at the beginning of the timeline and more spending at the end of the timeline.

Forecasting Back Loaded Curve 2

Bell Curve

Example

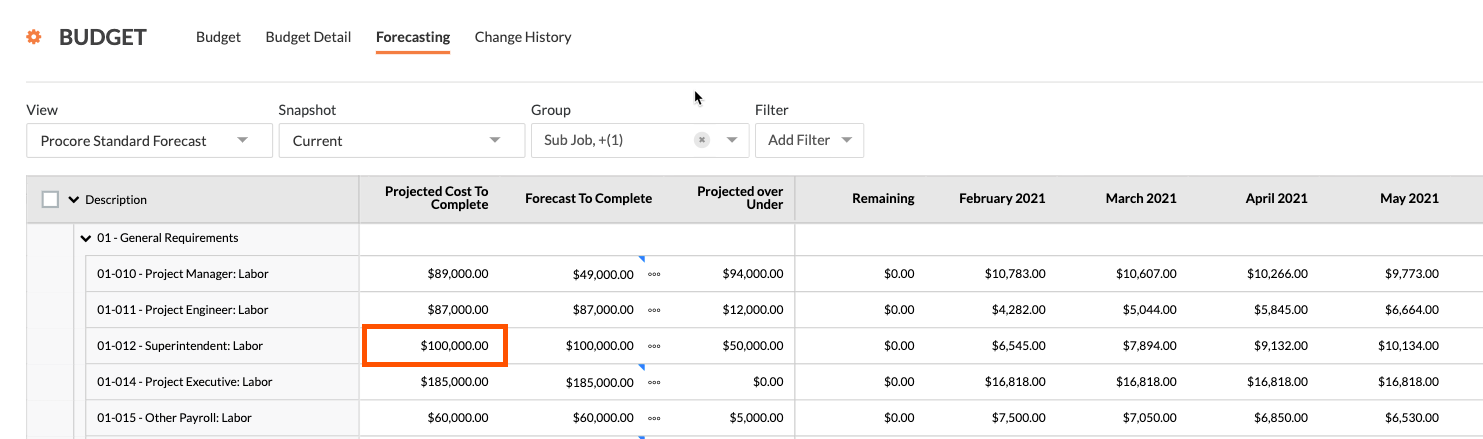
In the third line item of the example budget, the 'Bell' option is selected to adjust the spread, showing less spending at the beginning and end and more spending in the middle of the timeline. As shown below, the value in 'Projected Cost to Complete' is $100,000.00.

Forecast Projected Cost To Complete 3

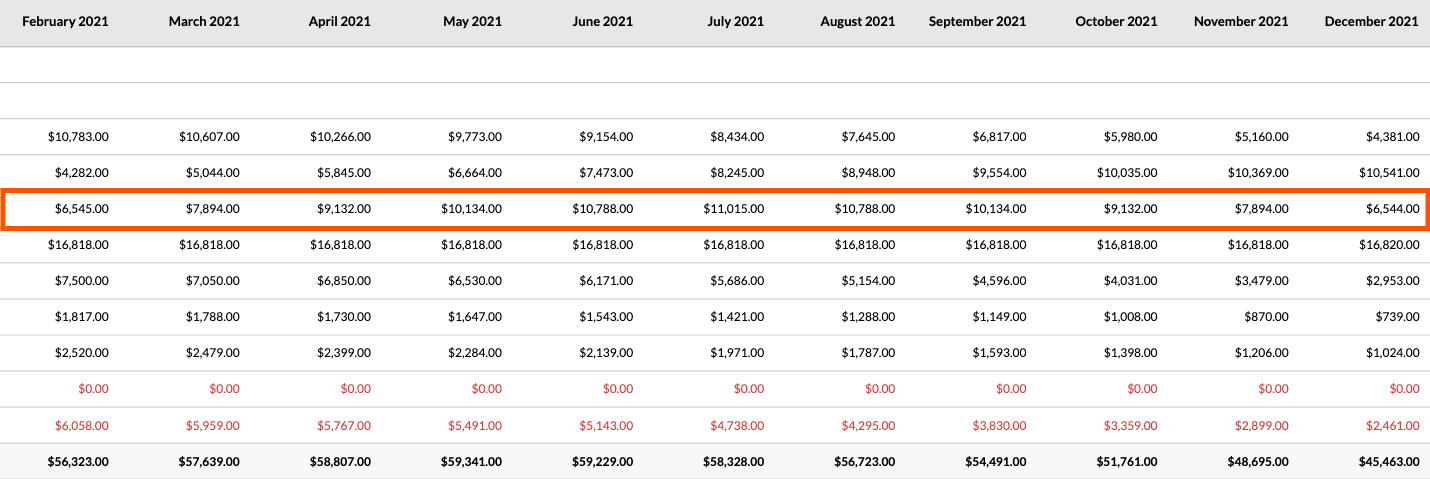
When you scroll to the right, notice how the bell curve spreads that $100,000.00 over the 10-month forecast period. As shown below, this spread shows less spending at the beginning and end of the timeline and more spending in the middle of the timeline.

Forecasting Bell Curve 3

Linear Curve

Example

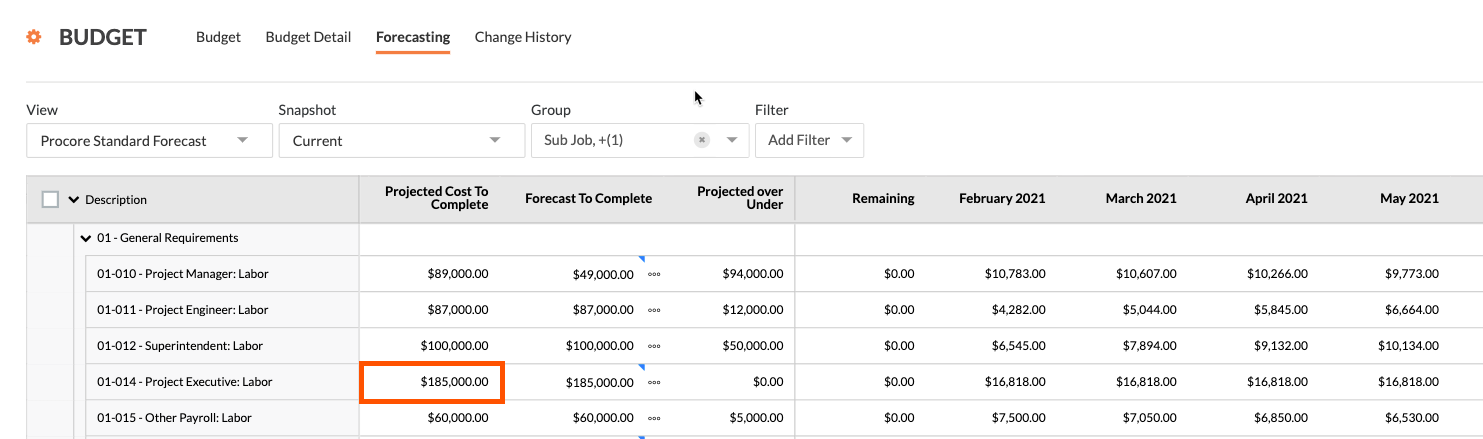
In the fourth line item of the example budget, the 'Linear' option is selected to adjust the spread to evenly distribute the amount in the 'Project Cost to Complete' column over the selected timeline. As shown below, the value in 'Projected Cost to Complete' is $185,000.00.

Forecast Projected Cost To Complete 4

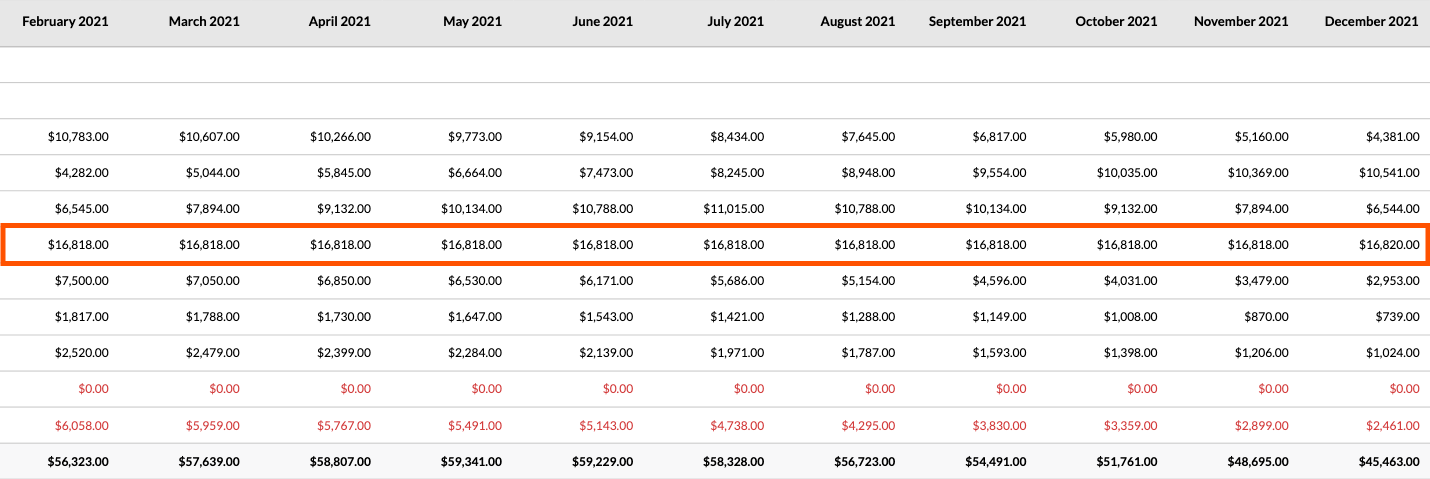
When you scroll to the right, notice how the linear curve evenly spreads $185,000.000 over the 10-month forecast period, as shown below.

Forecasting Linear Curve 4

Manual Curve

Example

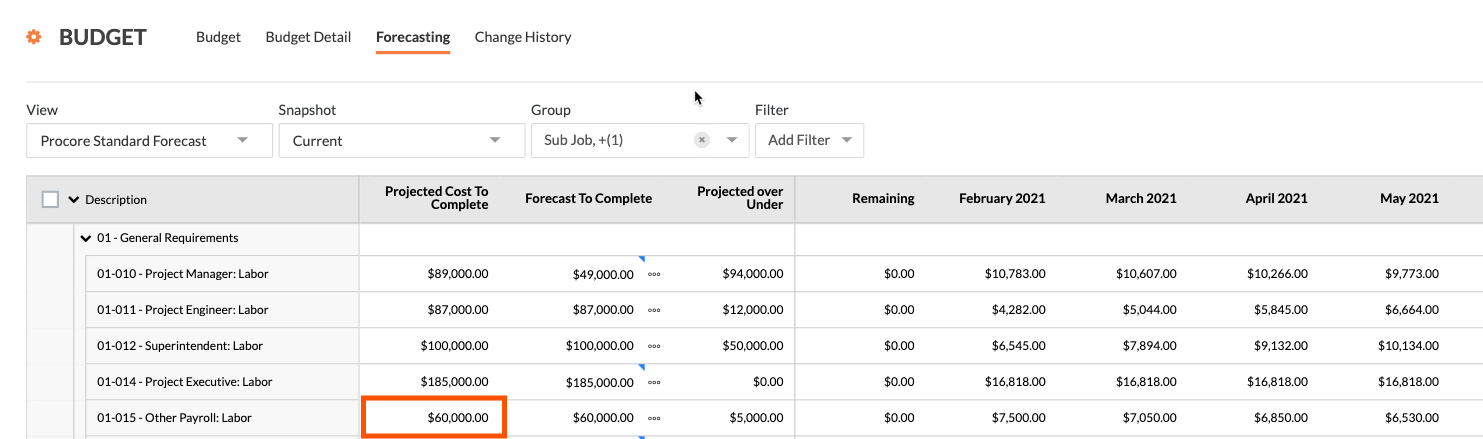
In the fifth line item of the example budget, the 'Manual' option is selected under the Curve column. Custom amounts are entered in each of the monthly forecast columns, allowing you to set specific cost projections for each month on the budget line item.

Forecast Projected Cost To Complete 5

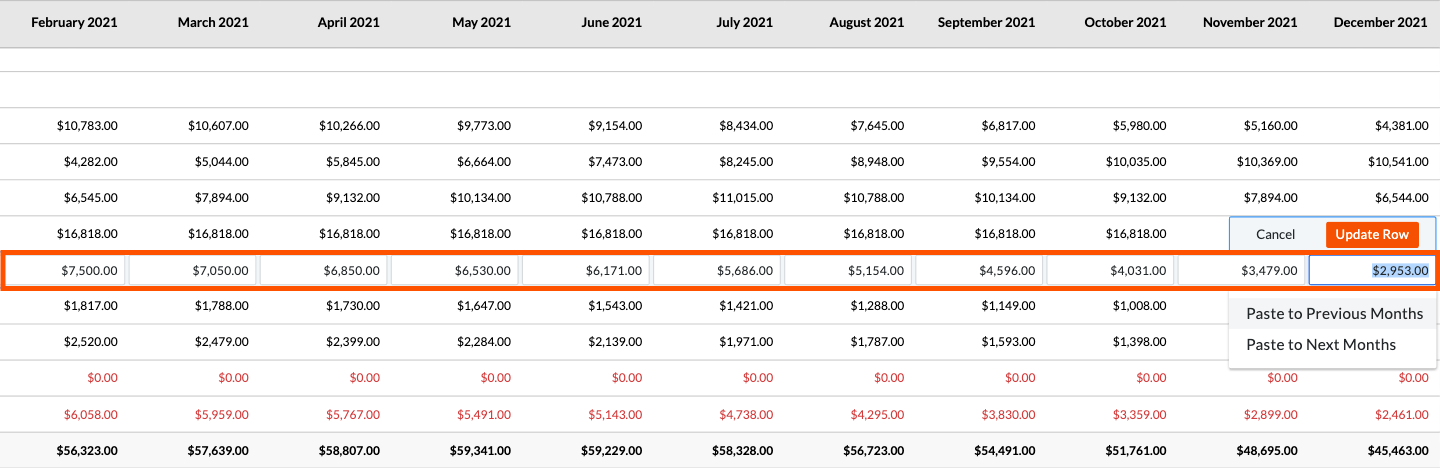
When you scroll to the right, you can click into the individual cells on the line item to manually enter your own values and spread monthly spending as needed. After entering the value, click the Update Row button. You also have the option to paste the amount you enter here to all previous months or to all of the following months. If you make a mistake, simply click Cancel.

Forecasting Manual 5

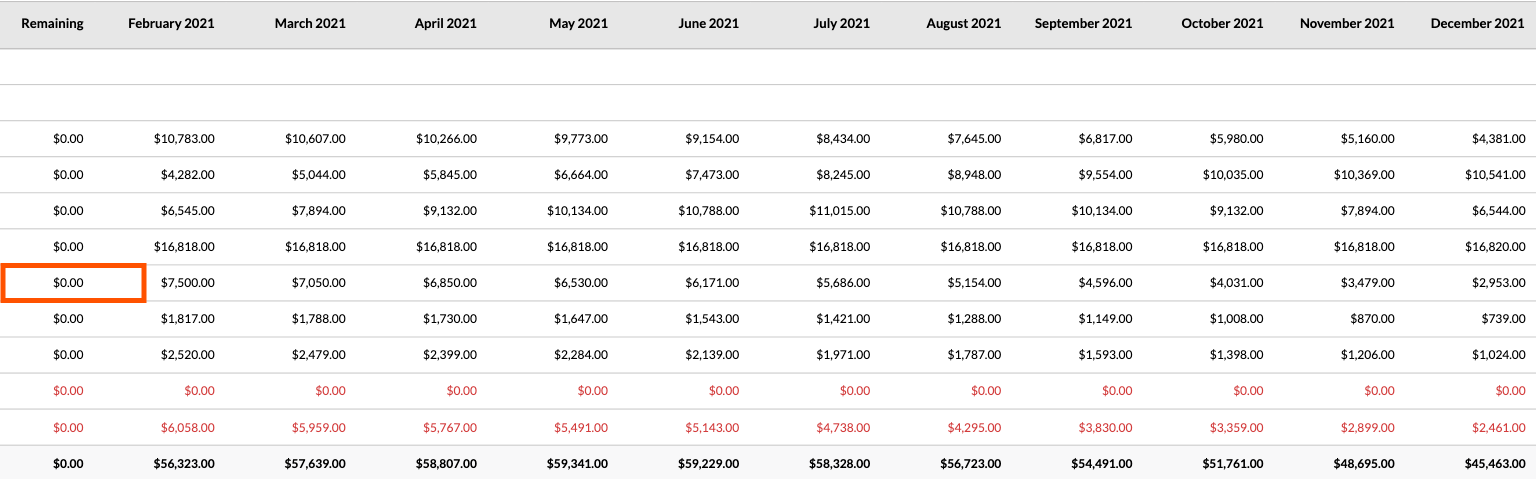
After Procore updates the row, the value in the 'Remaining' column updates to show you how many dollars you have left to allocate. When you have allocated the correct amount, the column value should read $0.00 as shown below.

Forecast Remaining Zero

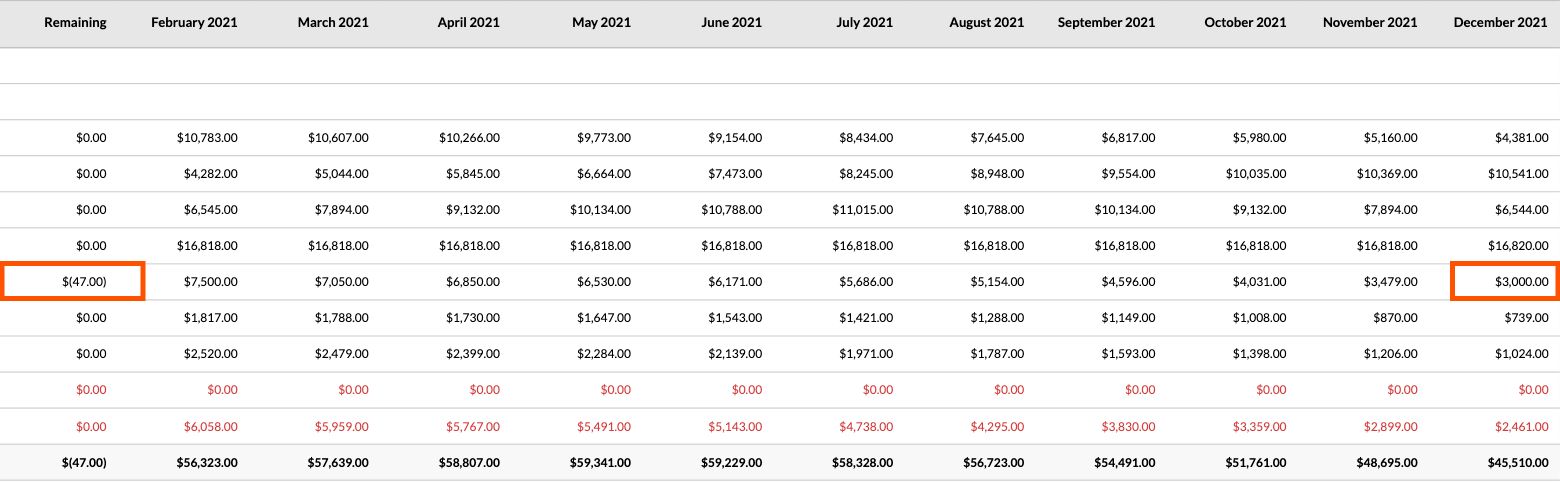
If you over-allocate the amount, the 'Remaining' column will show a negative amount in parentheses, as shown below.

Forecasting Over Allocated

See Also

Loading related articles...