Measure the Distance Between Objects in a Model
Background
The Measure tool allows users to take precise measurements in the 3D model viewer. This helps verify critical distances and dimensions on your project. The Measure tool offers two distinct modes for this purpose: Point-to-Point and Shortest Distance. Each mode is designed for a particular task, whether you need to measure a specific length or check the minimum clearance between two objects.
Things to Consider
Prerequisites
At least one model must be published to the project. See Publish a Model to Procore.
Steps
Navigate to the project's Models tool.
Click the model that you want to view in the 3D Model Viewer.
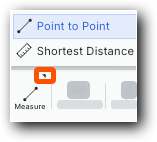
Click Measure in the toolbar.
Measure the distance between objects:
Position the measurement pointer on the first object in the model and click to select it.
Position the measurement pointer on the second object and click to select it.
Example: Point to Point vs. Shortest Distance
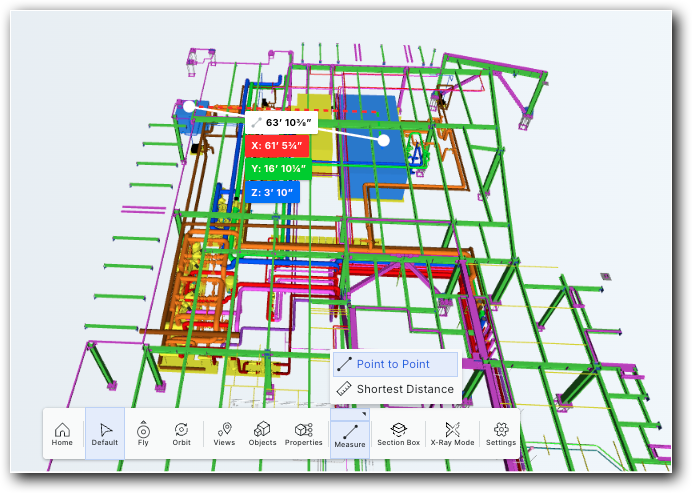
The Measure provides two measurements: Point to Point and Shortest Distance.
Point to Point calculates the exact distance between the two specific points you click. This gives you a direct, absolute line from point A to point B, which is useful for measuring specific diagonal distances or the length of a single object. This is represented by a series of multi-colored values:
The red value represents the distance along the X-axis.
The green value represents the distance along the Y-axis.
The blue value represents the distance along the Z-axis.
Shortest Distance automatically finds the closest points between two separate objects and gives you the perpendicular distance between them. This helps verify clearance or find the minimum gap.
The white value represents the shortest distance between objects.