Complete Owner Invoices with DocuSign®
Background
After your team creates an owner invoice, Procore users with a DocuSign® account can prepare a DocuSign® envelope for the invoice to send to the appropriate recipient(s) to request a signature.
If you are the recipient of a signature request, you do not need a DocuSign® account. However, if you do have a DocuSign® account and the email address matches the email you use in Procore, a copy of any documents you sign will be saved in your DocuSign® account. After all of the required signatures are collected in DocuSign®, Procore changes the status of the commitment to Approved.
Things to Consider
Required User Permissions:
'Admin' level permissions on the project's Prime Contracts tool
Additional Information:
Once you log into your DocuSign® account from Procore, you will NOT need to sign in again until the login token expires. Once expired, the Re-Authentication Required banner appears in Procore. To learn more, see What do the different DocuSign® banners in Procore mean?
To complete the steps below, the invoice must be in Approved, Approved as Noted, or Pending Owner Approval status.
Prerequisites
Enable the DocuSign® Integration on Your Company's Procore Account
To request signatures using the Procore + DocuSign® integration, you must have an active DocuSign® account. You do NOT need a DocuSign® account to sign a document. For details, see:
Steps
Open the Owner Invoice
Log in to DocuSign®
Prepare the DocuSign® Envelope
Open the Owner Invoice
There are two ways to open an owner invoice:
From the Prime Contracts Tool
From the Invoicing Tool
From the Prime Contracts Tool
Navigate to the project's Prime Contracts tool.
Locate prime contract associated with the owner invoice. Then click its Number link.
Click the Invoices tab.
In the Invoices (Payment Applications) table, click the Invoice # link.
In the invoice, click the Edit button.
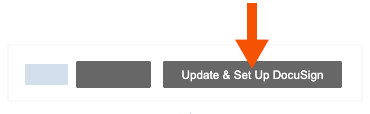
In the Summary tab, click the Update & Set Up DocuSign button.
From the Invoicing Tool
If you have 'Admin' level permission on the Prime Contracts tool, you can also use the project's Invoicing tool to send invoices to DocuSign® in bulk.
Navigate to the project's Invoicing tool.
Click the Owner tab.
Locate the invoice in the table. Then
, click the Invoice # link.
In the invoice, click the Edit button.
In the Summary tab, click the Update & Set Up DocuSign button.
Procore launches the DocuSign® application. If you are not already logged into DocuSign®, you will be prompted to enter your login credentials.
Log in to DocuSign®
If you are NOT logged into your DocuSign®account when you launch the DocuSign® application from Procore:
Notes
To learn how to gain access to DocuSign® from a Procore tool, see one of the tasks in Which Procore project tools support the DocuSign® integration?
To log into DocuSign® from Procore, you need valid login credentials (an email address and a password) for a DocuSign® account. To learn more, see Do I need a DocuSign© account? and How do I get a DocuSign® account?
At the DocuSign® Log In page, type your email address in the Email box:
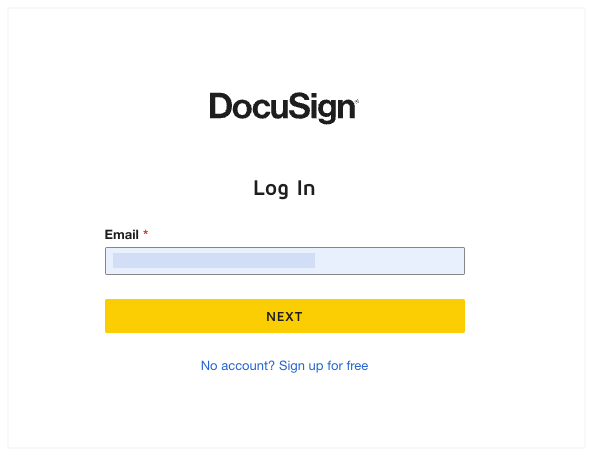
Click Next.
Enter your password.
Click Log In.
Prepare the DocuSign® Envelope
Once you are logged into the DocuSign®, the Upload a Document and Add Envelope Recipient page appears. Complete these steps:
Add Documents to the Envelope
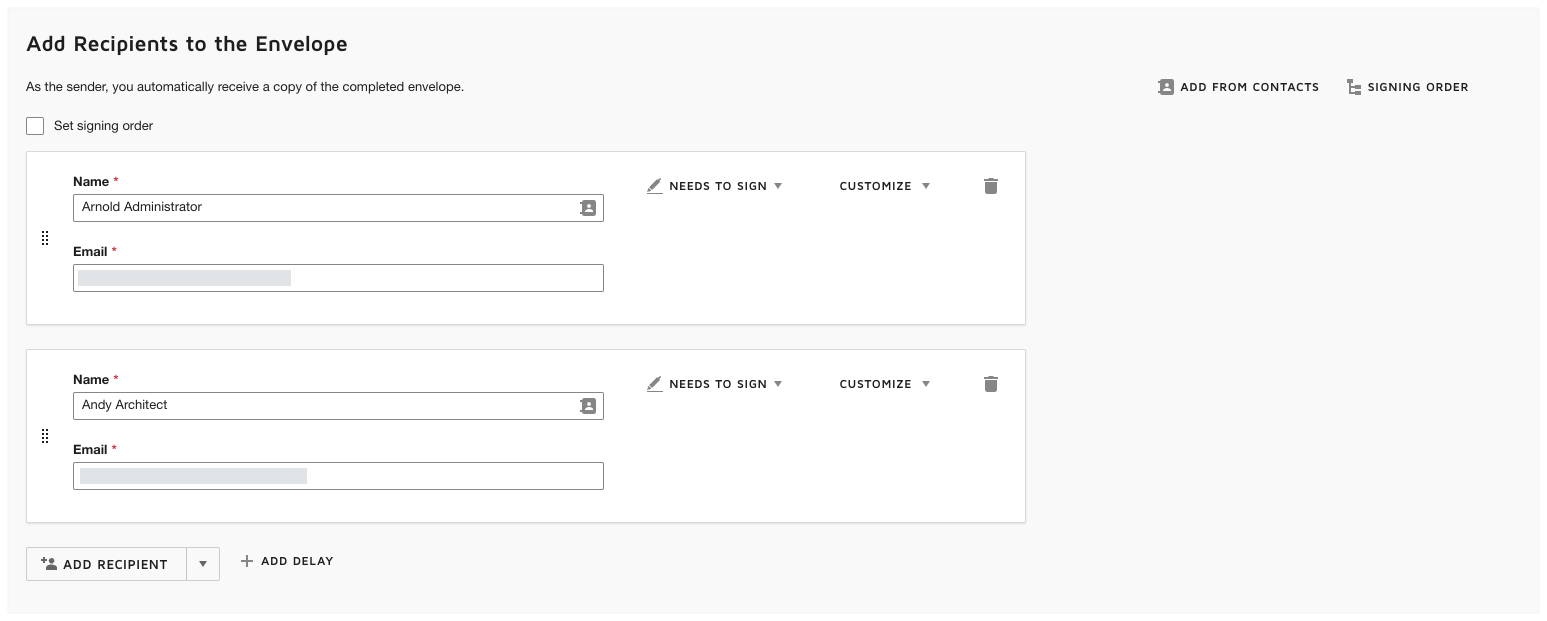
Add Recipients to the Envelope
Add a Message to All Recipients
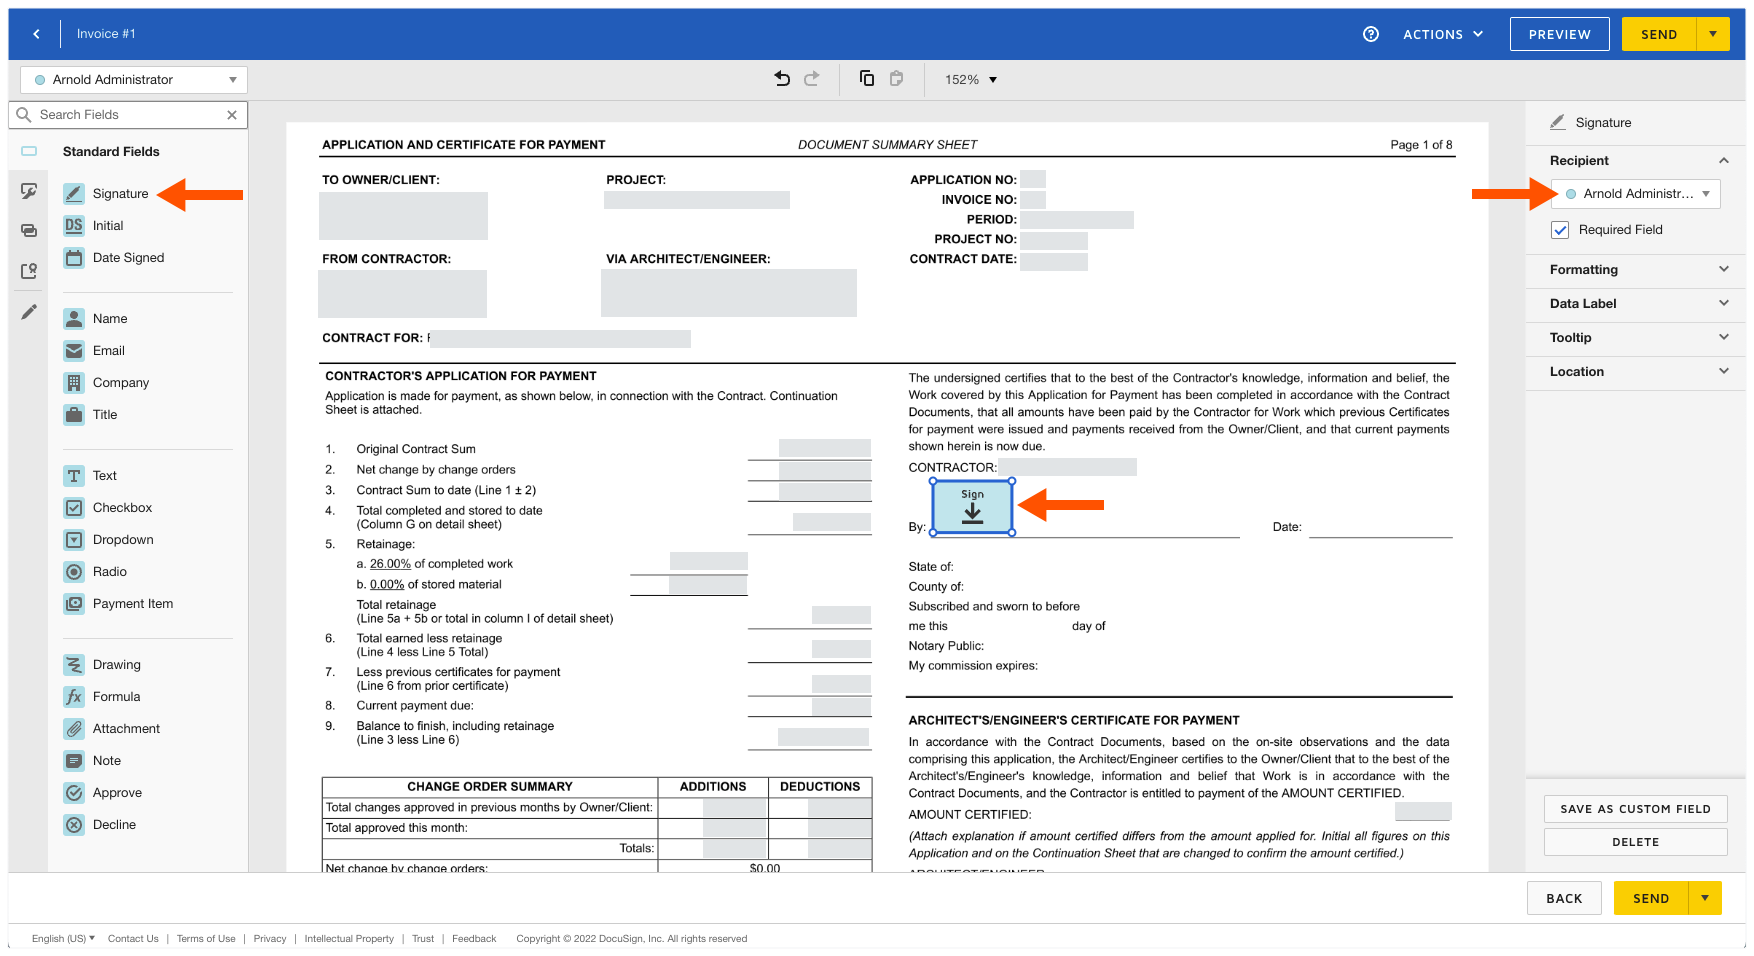
Add the Signature Fields & Send the Envelope
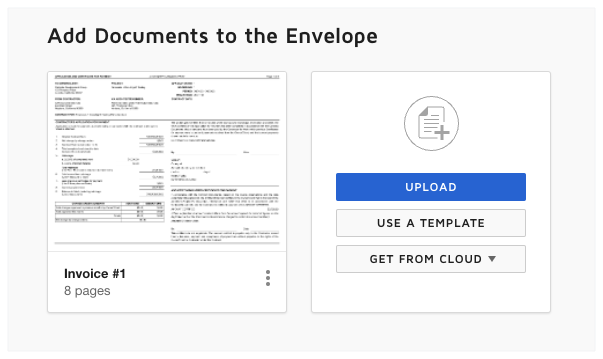
Add Documents to the Envelope
The following Procore information automatically populates the DocuSign® envelope:
A PDF copy of the invoice is automatically added to the Add Documents to Envelope section.
You have the option to add other documents as follows:
Optional: If you want to add additional documents to the envelope, choose one of the available options under the 'Add Documents to the Envelope' section:
Note
The available options in the 'Add Documents to the Envelope' section are developed and maintained by DocuSign®. To learn how to use DocuSign®, Procore recommends reviewing the content on support.docusign.com.