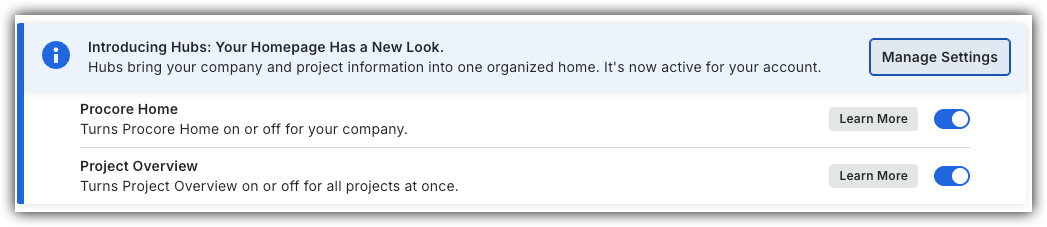
To return to the legacy Project Home, Company Administrators can navigate to the Company Portfolio / ProcoreHome tool, click Manage Settings and toggle Project OverviewOFF.
However, later this year it will be sunset and will no longer be available. If your company reverted to the legacy Project Home experience, Company Administrators can re-enable the Project Overview by switching Project Overview toggle ON.
Things to Consider
Required User Permissions:
'Admin' permissions on the project's Photos tool.
If setting the project photo from the Project Overview, you need 'Admin' level permissions to the project's Admin tool.
Prerequisites:
The desired photo must exist in the project's Photos tool. See Upload Photos.
Additional Information:
By default, a project does not have a project photo. An 'Admin' user must manually configure a project photo.
Only one photo can be selected as a project photo.
If a "private" photo is selected as the project image, all users will be able to view the image as the project image and thumbnail. However, the original photo in the Photos tool will only be visible to users with 'Admin' permissions on the project's Photos tool.
Recommended photo size is a 1:1 ratio.
The photo must be in one of the following formats:
JPEG (.jpg or .jpeg)
PNG (.png)
Steps
Navigate to the Project Overview.
Navigate to the project's Home to be redirected to the Project Overview.
Click Menu and select Project Overview.
Click the project photo or the camera icon.
Manage the Photo.
Upload New
Select Upload New.
Select the photo from your device and click Open.
Zoom and rotate the photo using the sliders until the desired image fits in the square.
Click Save.
Edit Photo
Select Edit.
Zoom and rotate the photo using the sliders until the desired image fits in the square.
Click Save.
Delete Photo
Select Remove.
Project Home (Legacy)
Navigate to the project's Photos tool.
Navigate to the photo which you want to set as the project photo.
Click the photo thumbnail or name. Note: This will bring you to the photo's view page.
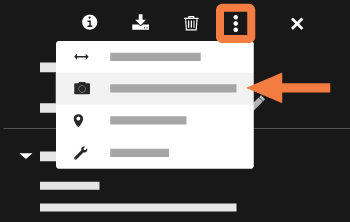
Click the vertical ellipsis (⋮) icon.
Click Set as Project Photo. Your photo will now appear under the Project Photo section of the project's Home page.
 OFF.
OFF.
 ON.
ON. icon.
icon.