Procore のプロジェクト会計ツールのカスタム予算コードの説明を作成する理由と方法を教えてください。
バックグラウンド
Procore のプロジェクト会計ツールの「予算コードの作成」機能を使用すると、チームはさまざまなユース ケースを満たすカスタム予算コードの説明を作成できます。たとえば、次のようなものがあります。
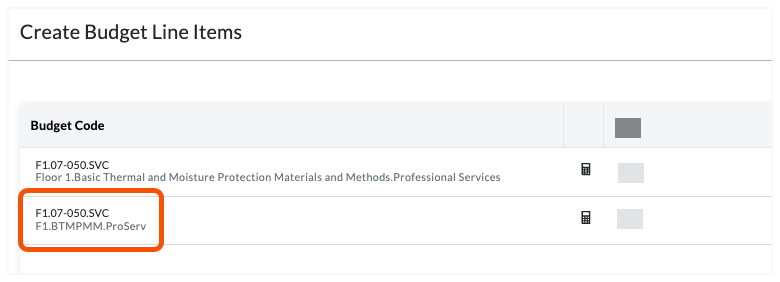
単一の予算コードに関する詳細な情報を取得する
予算コードの説明の読みやすさを向上させる
予算コードの説明を短くしてスペースを節約
カスタム予算コードの説明を作成する方法については、以下の回答を参照してください。
単一の予算コードに関する詳細な情報を取得する
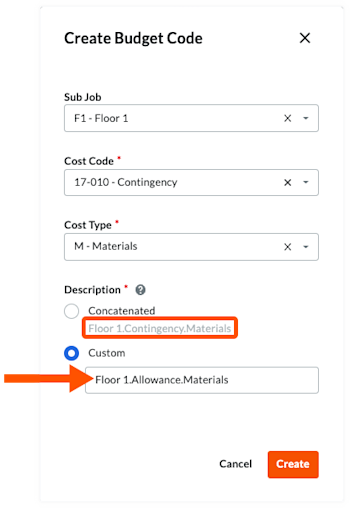
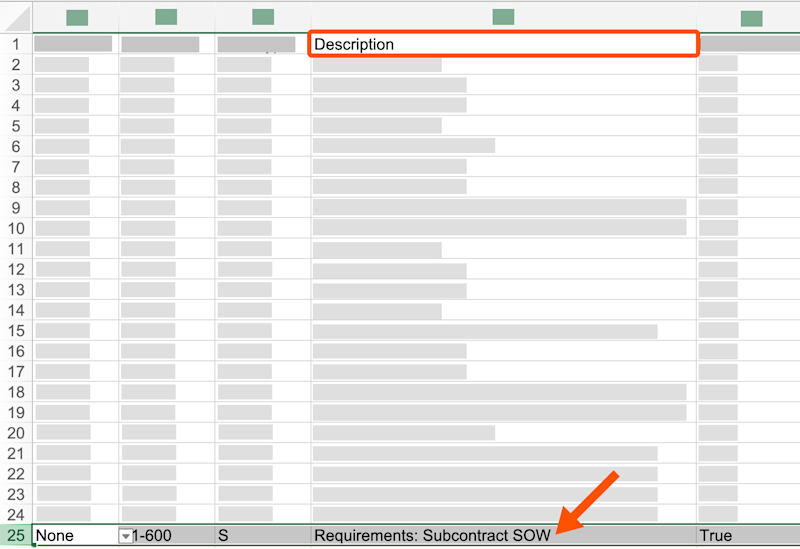
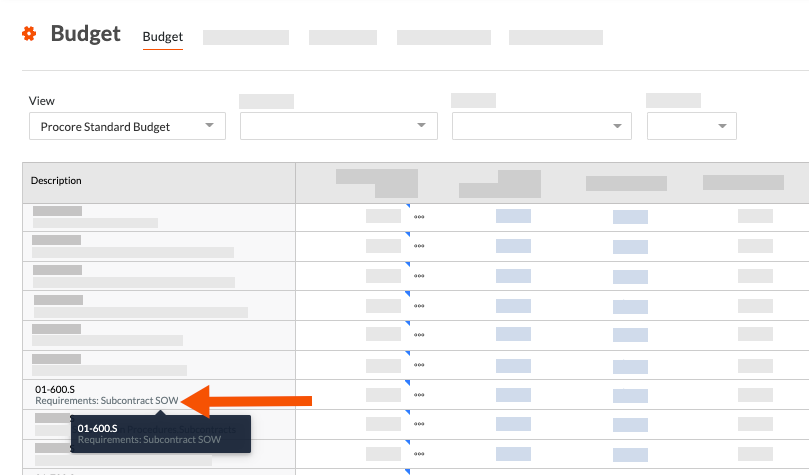
単一の予算コードに関するより詳細な情報を取得する場合は、この例を確認してください。
Example
Let's assume your Procore project is using only the default segment items in Procore's Work Breakdown Structure (WBS). In the 'Cost Code' segment, which is based on the CSI The MasterFormat is an organization standard that defines the master list of Divisions, Sections, and Section Titles for construction project specifications in the United States and Canada. It is authored by the Construction Standards Institute (CSI) and Construction Specifications Canada (CSC). See CSI MasterFormat®.
When the budget code for a financial line item is associated with an allowance
An allowance is an amount included in a contract sum to cover the costs of any items not specified in the contract.When the budget code for a financial line item is associated with a contingency
A contingency is an amount set aside in a contract to cover the costs of any additions to the scope of work due to unknown risk factors.
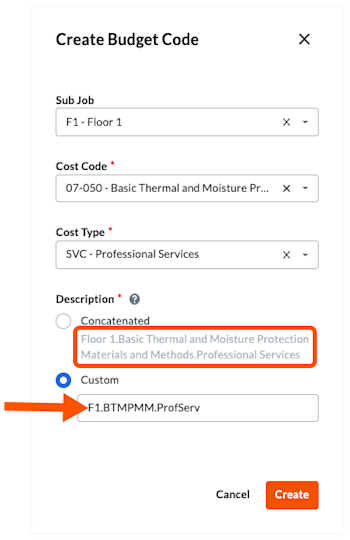
To address this scenario, you can use Procore's custom budget code description option to create two (2) descriptions for a single budget code. This allows your team to distinguish between the budget code is used for an allowance versus when its used for a contingency. In the illustration below:
The budget code is: F1.17-010.M
The custom budget code description is: Floor1.Allowance.Materials
The default budget code description is: Floor1.Contingency.Materials
You can also create additional budget code descriptions for each budget code to suit your organizations specific needs.

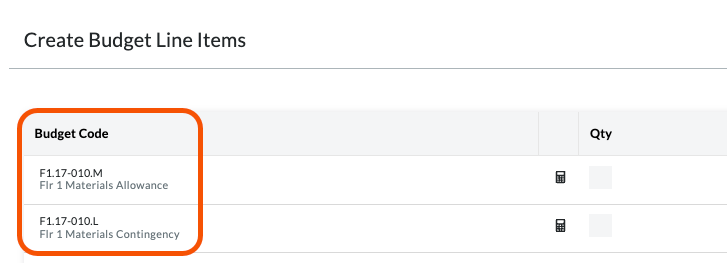
予算コードの説明の読みやすさを向上させる
Procore の 予算コード構成は、組織が確立したパターンに従って意味のある予算コードを構築するために使用される一連のセグメントです。Procore の作業分解構成図では、会社またはプロジェクトの予算コード構成を複数のセグメントで構成できます。
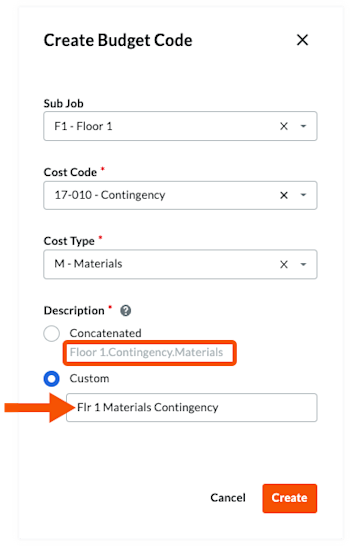
Example
Using the same example as above, you can also use Procore's custom budget code description option to simplify and improve readability of your budget codes. This can improve readability of your budget codes, as shown in the illustration below:
The budget code is: F1.17-010.M
The custom budget code description is: Flr 1 Materials Allowance
The custom budget code description is: Flr 1 Materials Contingency
The illustration below shows you how the custom descriptions can improve readability.