Create a Receipt
In Beta
This feature is currently in beta.
This feature is currently in beta.
You can use Procore to manage materials for your project. From the Materials tool, you can create receipts to track the materials you have received, and any defects. You can create receipts for orders placed outside of Procore, or approved commitment change or purchase orders made in Procore's Commitments tool.
For customers using Commitments, it's recommended that you create a receipt from an order or a shipment. If you create a receipt from an order, it will automatically create a shipment. If you have already created a shipment for that order, it will create a duplicate. You can delete the duplicate shipment.
If creating a receipt from a shipment, the Document Status for the shipment must say 'Released'. See Update a Shipment.
If creating a receipt from uploaded materials, you must create your receipt from the 'Create' button.
Locations must already be created in Procore. See Add Locations to a Project.
Materials must be listed in your inventory using one of the following methods:
The Commitments tool was used to create a commitment change order or purchase order for materials, and includes the following information:
The status is Approved
The Schedule of Values (SOV) includes the following for each line item:
Description
Unit of Measure (UOM)
Create a receipt from the 'Create' button
Create a receipt from an order
Create a receipt from a shipment
If you uploaded your materials instead of ordering them through the Commitments tool, use this method to create your receipt.
Navigate to the project's Materials tool.
Add materials that need to be adjusted to your list. See Add Materials to List.
Click Create and select Receipt.
Enter the 'Vendor' information.
Enter the 'Receipt Date'.
Select the 'Reference Type' for the receipt.
Enter the 'Reference Number' for the receipt.
Select the 'Inspected By Name' for the person who inspected the received materials.
Select the 'Received By Name' for the person who received the materials.
Optional: Enter any notes.
Under 'Line Items', click the quantity field for each line item and enter the quantity of the material that needs adjustment.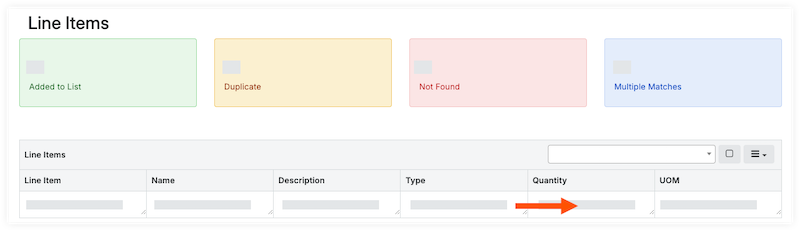
Click Build Document.
Under 'Document Line Items', review the line items.
Review the date received. If you need to make a change, see Update Material Received Date.
Review the quantity.
Enter the storage location for each line item.
Update an Individual Line Item
Click the To Location and select the location from the drop-down menu.
Click the From Location field and select the location from the drop-down menu.
Bulk Update Line Items
Mark the checkbox for each line item.
Under 'Storage Location', select the To Location or From Location from the drop-down menu.
Click Set Selected to set the location for the selected items or click Set All to set the location for all line items.
Add Materials to a Container
Follow steps to Add Materials to a Container.
If materials received are unacceptable, over, short, or damaged (UOSD), follow the steps to Create a UOSD Defect.
Update the Status of acceptable materials.
Update an Individual Line Item
Click the 'Status' field for the item, and select the Checked > Acceptable from the drop-down menu.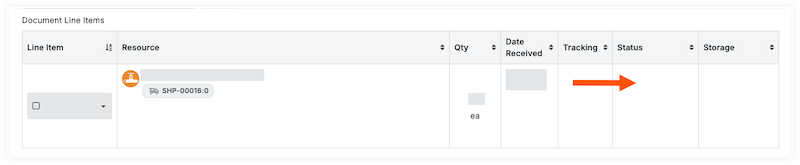
Bulk Update Items
Mark the checkbox for each line item.
Under 'Status/Condition', select the Checked > Acceptable from the drop-down menu.
Click Set Selected to set the status for the selected items or Set All to set the status for all line items.
If a line item is a replacement for a defect, follow steps to Associate Line Items with a Defect.
Optional: Upload Attachments to Materials.
If you have already created a shipment, create the receipt from that shipment. Otherwise, you will create a duplicate shipment.
Navigate to the project's Materials tool.
Click the Control tab.
Click the Orders sub tab.
Click the order number you want to create a receipt for.
Mark the checkboxes for the items on the receipt.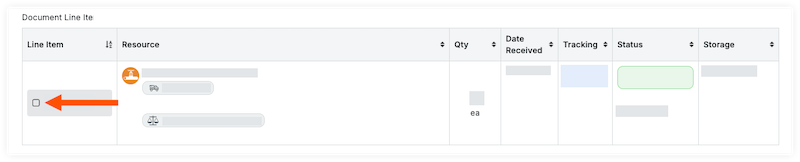
OR
Select the checkbox in the 'Document Line Items' header to select all items on the order.
In the 'Documents Line Items' header, click the hamburger ![]() icon and select Create Receipt.
icon and select Create Receipt.
Enter the receipt information.
Click Create.
Under 'Document Line Items', review the line items.
Review the date received. If you need to make a change, see Update Material Received Date.
Review the quantity.
Enter the storage location for each line item.
Update an Individual Line Item
Click the To Location and select the location from the drop-down menu.
Click the From Location field and select the location from the drop-down menu.
Bulk Update Line Items
Mark the checkbox for each line item.
Under 'Storage Location', select the To Location or From Location from the drop-down menu.
Click Set Selected to set the location for the selected items or click Set All to set the location for all line items.
Add Materials to a Container
Follow steps to Add Materials to a Container.
If materials received are unacceptable, over, short, or damaged (UOSD), follow the steps to Create a UOSD Defect.
If materials listed on the receipt are arriving in a separate shipment, click the 'Status' field for the item, and select the Zero Shipped.
Note: This will update the quantity of this line item to 0.
Update the Status of acceptable materials.
Update an Individual Line Item
Click the 'Status' field for the item, and select the Checked > Acceptable from the drop-down menu.
Bulk Update Items
Mark the checkbox for each line item.
Under 'Status/Condition', select the Checked > Acceptable from the drop-down menu.
Click Set Selected to set the status for the selected items or Set All to set the status for all line items.
If a line item is a replacement for a defect, follow steps to Associate Line Items with a Defect.
Optional: Upload Attachments to Materials.
Navigate to the project's Materials tool.
Click the Control tab.
Click the Shipments sub tab.
Click the shipment you want to create a receipt for.
Mark the checkboxes for the items on the receipt
OR
Select the checkbox in the 'Document Line Items' header to select all items on the order.
In the 'Documents Line Items' header, click the hamburger ![]() icon and select Receive.
icon and select Receive.
Enter the receipt information.
Click Create.
Under 'Document Line Items', review the line items.
Review the date received. If you need to make a change, see Update Material Received Date.
Review the quantity.
Enter the storage location for each line item
Update an Individual Line Item
Click the To Location and select the location from the drop-down menu.
Click the From Location field and select the location from the drop-down menu.
Bulk Update Line Items
Mark the checkbox for each line item.
Under 'Storage Location', select the To Location or From Location from the drop-down menu.
Click Set Selected to set the location for the selected items or click Set All to set the location for all line items.
Add Materials to a Container
Follow steps to Add Materials to a Container.
If materials received are incorrect, damaged, over, or short, follow the steps to Create a Defect.
If materials listed on the receipt are arriving in a separate shipment, click the 'Status' field for the item, and select the Zero Shipped.
Note: This will update the quantity of this line item to 0.
Update the Status of acceptable materials.
Update an Individual Line Item
Click the 'Status' field for the item, and select the Checked > Acceptable from the drop-down menu.
Bulk Update Items
Mark the checkbox for each line item.
Under 'Status/Condition', select the Checked > Acceptable from the drop-down menu.
Click Set Selected to set the status for the selected items or Set All to set the status for all line items.
If a line item is a replacement for a defect, follow steps to Associate Line Items with a Defect.
Optional: Upload Attachments to Materials.
Post a Receipt
Post a Receipt