Add a Condition Step
Configure a 'Condition Step' in the Workflow Builder by naming it, defining conditions with tool-specific statements, and setting the next workflow steps based on whether conditions are met.
Steps
Add a Condition Step
Navigate to the Workflow Builder. Use these steps when configuring a workflow step in a new or existing workflow.
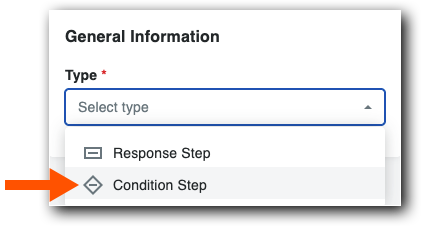
Under General Information in the Type list, choose: Condition Step

Add General Information
Name your workflow in Step Name.
Confirm that Condition Step is set in the Type list.
From the When list, select a tool-specific statement.
先端
フィールドがありませんか?カスタム フィールドの種類である [単一] と [複数選択] を、条件で使用するカスタム フィールドのセットで [必須] と [表示] に設定する必要があります。
Choose an available operator from the Is box. Each condition statement has different options. To learn more, see Tool-Specific Statements and Conditions.

In the Then list, choose the next step or create a new step for the workflow template.
In the Otherwise list, choose the next step or create a new step for the workflow template.
先端
ワークフロー ステップは、条件が満たされない場合、または項目が空の場合に定義した [その他] ステップに常に移動します。