Configure Workflow Templates on Projects
Once workflow templates are assigned to projects, they need to be configured with an individual tool's settings. This is the process where workflow steps are assigned to specific users and the amount of days they have to respond is set. A default workflow will also need to be set for the tool it is associated with before it can be applied and used to approve an item.
Background
After a workflow template is published and assigned to a project, it will need to be configured on the project before it can be used. Configuration includes assigning a person to act as the 'Workflow Manager' and assigning the appropriate distribution group(s) and assignees to your workflow. A specific template must also be set as the 'Default' for the tool before it can be used.
Things to Consider
Required User Permissions:
'Admin' level permissions on the project tool being configured.
Steps
(Optional) You can Enable a Project Level Workflow Templates to provide project teams the autonomy to create and customize workflows directly within their project environment, without relying on company-level permissions.
Navigate to the tool where the workflow is being configured.
Click the Configure Settings
 icon.
icon.
Note: For the Correspondence tool, select the configure settings for the specific correspondence type of the workflow template.(Optional) You can Clone a Project Level Workflow Template to create a new workflow template that's the same or very similar to an existing one.
Note
Project Level Workflow Templates must be enabled in order to use the clone functionality.
Click 'Workflow Settings' in the right pane.
Note: The Invoicing and Correspondence tools do not have a dedicated 'Workflow Settings' page. Scroll to the bottom of the Invoicing tool configure settings to access Invoicing workflow configurations.
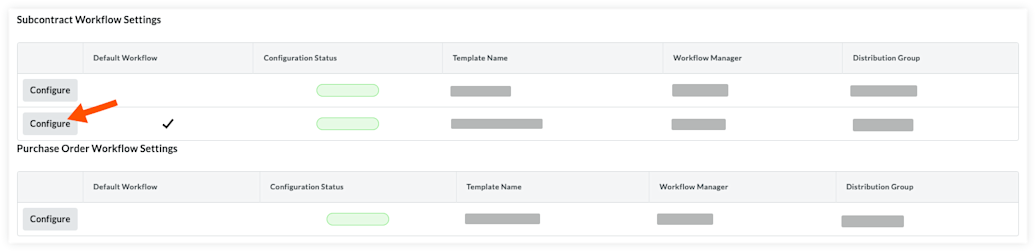
Click Configure next to the workflow being configured to open the workflow viewer.
Example