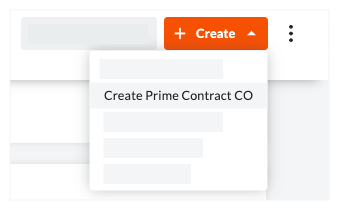
Create Prime Contract Change Orders (Beta)

Background

If the Change Events tool is enabled on your project, your project's change order tier configuration setting. The tier setting determines the number of steps that take place before creating a prime contract change order. To learn more, see What are the different change order tier settings in Project Financials?)

Change Order Tier Setting

For three (3) tier, start here...

For two (2) tier, start here...

For one (1) tier, start here...

One (1) Tier

N/A

N/A

See below

Two (2) Tier

N/A

Create a Potential Change Order for a Prime Contract from a Change Event

See below

Three (3) Tier

Create a Potential Change Order for a Prime Contract from a Change Event

Create a Change Order Request

See below

Things to Consider

  • Required User Permissions:

    • 'Standard' or 'Admin' level permissions on the project's Change Events tool.
      AND

    • 'Standard' or 'Admin' level permissions on the project's Prime Contracts tool.

       Notes

      For users with 'Standard' level permissions on the project's Prime Contracts tool to perform this task, the following must also be true:
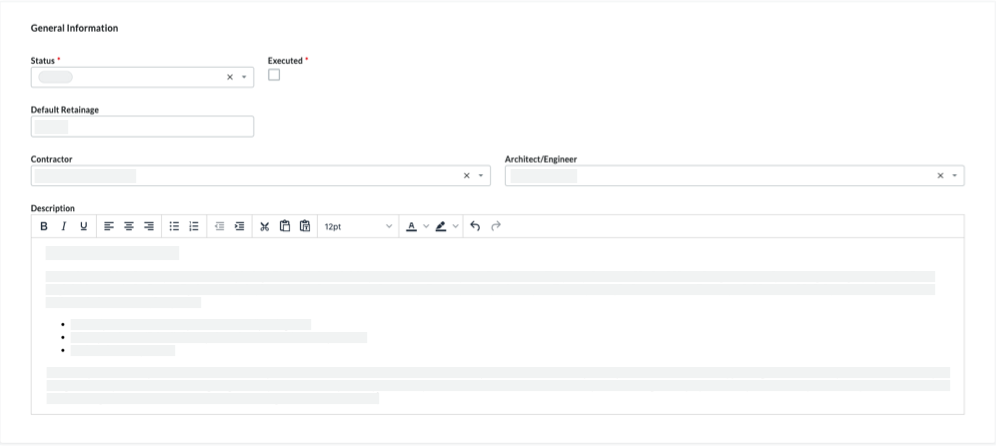
  • Required Configuration Setting:

  • Additional Information:

    • After you create a change event, you can also create an RFQ to send to the affected subcontractor(s). See Create RFQs.'

  • Show/Hide If your company has enabled the ERP Integrations tool, keep these items in mind:

    If your company has enabled the ERP Integrations tool, keep these things in mind:

    • QuickBooks® Desktop: Prime Contract Change Order exports are NOT supported.

    • Sage 100 Contractor®: Prime Contract Change Orderexports are NOT supported.

    • Sage 300 CRE®:

      • Title. The Prime Contract Change Order title must be 30 characters or less.

      • Number (#). The Prime Contract Change Order number must be five (5) characters or less.

      • Status. The Prime Contract must be in the Approved status.

      • Associated Line Item. For each line item that you add to the change order's Schedule of Values (SOV), you may designate one (1) associated line item for each change order line item or the same associated line item for all change order line items. Note: The Associated Line Item list is only visible and available when the ERP Integrations tool has been configured to work with Sage 300 CRE® and the Export Prime Contract Change Order capability has been switched on in Procore by your Integration Implementation Specialist.

    • Viewpoint® Spectrum®: Prime Contract Change Order exports are NOT supported.

    • Vista® : Prime Contract Change Order exports are supported.

    • CMiC:

      • Date. Required field.

      • Status. The Prime Contract must be in the Approved status.

      • Associated Line Item. For each line item that you add to the change order's Schedule of Values (SOV), you may designate one (1) associated line item for each change order line item or the same associated line item for all change order line items. Note: The Associated Line Item list is only visible and available when the ERP Integrations tool has been configured to work with CMiC and the Export Prime Contract Change Order capability has been switched on in Procore by your Integration Implementation Specialist.

      • Markups. Horizontal Markups are allowed. Vertical Markups are not allowed at this time.

Prerequisites

Steps

  1. Locate the Prime Contract to modify. Then click its Number link.

  2. Click the Create button and choose one of these options:

    • If your project uses the one (1) tier change order tier setting, choose the Create Prime Contract COoption.

    • If your project uses the two (2) or three (3) tier change order tier setting, choose the CreatePrime PCO option. You must create a potential change order before you can create a Prime Contract Change Order (i.e., for 2-tier change orders) or change order request (i.e., for 3-tier change orders).

      Example

      The illustration below shows you the location of the 'Create' button. The options in the drop-down list will vary, depending on your project's change order tier setting.create-prime-contract-co.png

  3. Update the General Information:
    create-prime-contract-general-information.png

    Show/Hide General Information

    • Sign with DocuSign®
      If you have enabled the Procore + DocuSign® integration (see Enable or Disable the DocuSign® Integration on a Procore Project), a checkmark appears in this box by default. If you do NOT want to collect signatures with DocuSign®, remove the mark.

       Tip

      How do you collect signatures with DocuSign? After the data entry for the item is complete, Procore recommends changing the item's status to 'Out for Signature' before clicking the Send to DocuSign button to launch the DocuSign® application. If you have not previously signed in, you will be prompted to Log In to DocuSign®. Once you are signed in, you can prepare the DocuSign_®_ envelope for signatures. After the signature process is complete, Procore automatically changes the status of the item to 'Approved' and marks the item as 'Executed'. To learn more, see DocuSign®.

    • #
      Accept the default number, enter a new number, or create a custom numbering scheme for this change order and future ones.

    • Created By
      Procore automatically populates this field with the name of the user who created the change order.

    • Revision
      If you revise a change order later, you can enter the revision number here.

    • Created By
      Procore automatically populates this field with the name of the user who created the change order.

    • Title
      Enter a descriptive name here.

    • Status
      Procore automatically assigns agreements the 'Default' status. To select a different status, choose one of the status labels from the drop-down list. Options include Draft, Out for Bid, Out for Signature, Approved, Complete, or Terminated.

       Note

      To create Prime Contract Change Orders (PCCOs) and owner invoices, your prime contract's status must be set to Approved or Complete.

    • Executed
      Place a mark in this check box if the agreement has been fully executed. A fully executed agreement is legally effective and has been signed by authorized representatives for each party.

    • Default Retainage
      Enter a number to represent the percentage that will be withheld as retainage on the line items included in the Schedule of Values. For example, if you plan to withhold ten (10) percent of the line item's value, enter 10%.

    • Contractor
      Select the 'Contractor' from this drop-down list. This is the company that your team hired to perform the work. To appear as a list option, Add a Company to the Project Directory.

    • Architect/Engineer
      Select the lead architect or engineer for the project from this drop-down list. To appear as an option in this list, the company must have a record in the Project Directory.

    • Description
      Enter a more detailed description of the agreement. You can apply the options in the formatting toolbar to your text.

  4. Select an option to save the change order:

    • Create: Saves the change order.

    • Create & Email: Saves the change order and automatically sends email notifications.

    • Complete with DocuSign: Saves the change order and initiates the DocuSign process to collect required signatures (only available if using the Procore + DocuSign® integration).

See Also

Loading related articles...