Remove Configurable Fieldsets from Projects
背景
可配置字段集是某些 Procore 工具中的一组字段,可以根据公司的需求设置为可选、必填或隐藏状态。这样做可以在用户在 Procore 项目中创建和编辑项目时更好地控制数据输入。请参阅什么是可配置字段集以及哪些 Procore 工具支持它们?
如果之前已将可配置字段集应用于项目,你可以选择从该项目中删除自定义配置。取消选择项目后,字段集将返回为 Procore 默认字段集。如果要删除字段集,请参阅删除可配置字段集。
Things to Consider
Required User Permissions:
'Admin' level permissions on the Company level Admin tool.
Additional Information:
After a project has been deselected from the 'Assigned Projects' window, the fieldsets will return to Procore's default fieldsets.
Configurable fieldsets applied to projects will be reflected on both Procore's web and mobile applications.
先决条件
See Create New Configurable Fieldsets OR click here to view the steps.
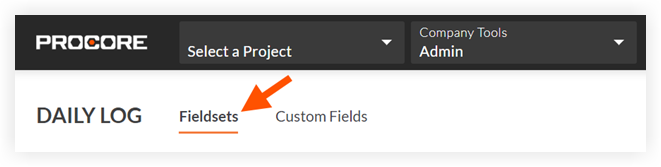
Navigate to the Company level Admin tool.
Under 'Tool Settings', click the tool you want to create configurable fieldsets for.
Click the Fieldsets tab.
Note: Tools without other settings in the Company level Admin tool will open to this page automatically.Click Create Fieldset and if required, select the fieldset type.
Enter a name for the fieldset, then click Create.
On the 'Edit Fieldset' page, each field name has the following options:
Do one of the following:
Click the toggle to the ON
 position to make the field visible in the section.
 Click the toggle to the OFF
 position to hide the field in the section. Note: A
  icon indicates that the field is visible by default and cannot be changed to hidden.
Do one of the following:
Mark the 'Required' checkbox to designate the field as required.
Clear the 'Required' checkbox to designate the field as optional. Notes:
Fields without a checkbox are optional by default and cannot be changed to required.
A gray marked checkbox
 indicates that the field is required by default and cannot be changed to optional.
Optional: If available, click Create Section to create a new section. See Create Custom Sections.
Click Save.
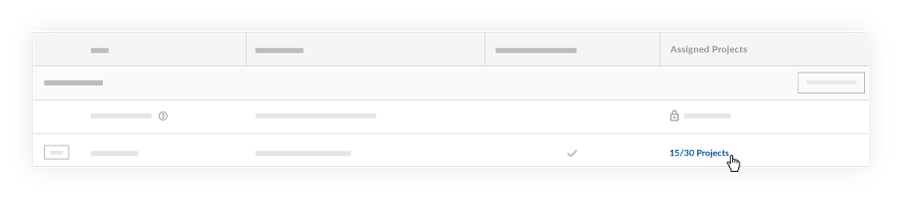
In the 'Apply changes to [#] project(s)?' window, click Assign Projects to add the fieldset to projects.
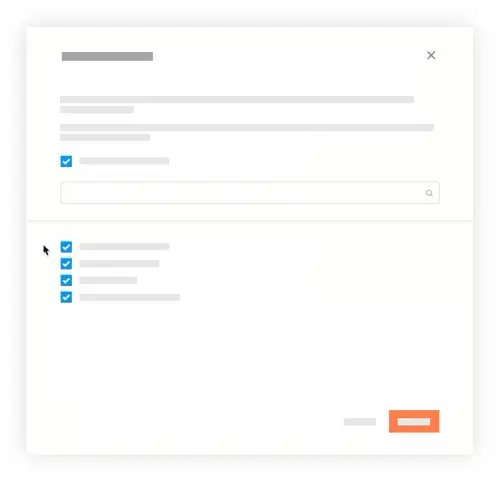
In the 'Assign Projects' window, mark the checkbox next to each project you want to apply the fieldset to and click Update.
In the 'Apply changes to [#] project(s)?' window, click Confirm.
Optional: To set a fieldset as the default for new projects, click the
 icon at the end of its row on the 'Fieldsets' tab and select Set as New Project Default.
 Note
Projects created from a project template that includes fieldsets will inherit the fieldsets from the project template instead of your company's default fieldsets. See Configure a Project Template.