Manage Scheduled Messages for Resource Planning
Background
You can schedule messages to send to people that you manage in Resource Planning. This tutorial shows how to view, send, edit, and delete scheduled messages.
Things to Consider
Messages sent in Resource Planning do NOT appear in the Emails tool in Procore.
Messages are limited to 1,200 characters.
Message and data rates may apply when sending or receiving SMS messages.
Messages that are only visible to you have a lock
 icon.
icon.Deleted messages are permanently removed from Resource Planning and cannot be recovered.
Steps
Edit Scheduled Messages
Send Scheduled Messages Now
View Scheduled Messages
Edit Scheduled Messages
Navigate to the Company level Resource Planning tool.
Click Communications (Beta).
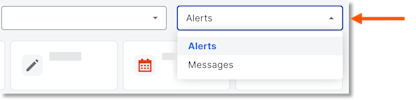
Select Messages from the drop-down menu.
Select Scheduled.
In the 'Date/Time Sent' column, select the envelope
 icon for the message.
Edit the message.
Send As.
Individual Message. Select to send the same message to multiple recipients, as individual messages.
Group Message. Select to send the message to multiple recipients.
Recipients.
Select recipients from the 'Add Recipient' drop-down menu to add them to the message.
Click remove next to a recipient to remove them.
Subject. Enter the subject of the message.
Message Content. Enter the message.
Schedule Delivery. Select whether the message is scheduled for delivery.
Leave the 'Schedule Delivery' toggle
 ON to schedule the message. Update date and time for the message to be sent.
Move the 'Schedule Delivery' toggle
 OFF to save the message as a draft.
Optional: Mark the 'All Users Can See This Message' checkbox to allow other users to access the message in the Resource Planning Communications tab.
Click Schedule or Save Draft.
Send Scheduled Messages Now
Navigate to the Company level Resource Planning tool.
Click Communications (Beta).
Select Messages from the drop-down menu.
Select Scheduled.
In the 'Date/Time Sent' column, select the envelope
icon for the message.Move the 'Schedule Delivery' toggle
OFF.Click Send.
View Scheduled Messages
Navigate to the Company level Resource Planning tool.
Click Communications (Beta).
Select Messages from the drop-down menu.
Select Scheduled.
In the 'Date/Time Sent' column, select the envelope
icon for the message you want to view.
See Also
Loading related articles...