回答ステップを追加する
Master the 'Response Step' for precise control over your project workflows. Configure essential general information, define how decisions are made using options like 'First Responder Decides' or 'Multiple Responders Decide,
Steps
Add a Response Step
Navigate to the Workflow Builder.
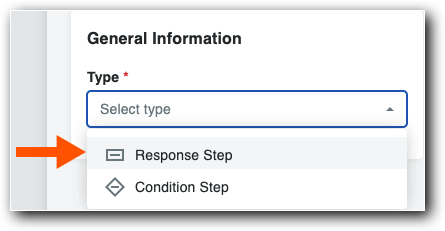
Use these steps when configuring a workflow step in a new or existing workflow.Under General Information in the Type list, choose: Response Step

Add General Information
Name your workflow in Step Name.
Select Response Step in the Type list.
From the Status list, choose one option: Draft, Under Review, Pending Owner Approval, or Revise and Resubmit.
Under Days to Complete, enter the number of days to complete the item and choose Calendar Days or Business Days from the list. This defines how many days the 'Responsible Group' has to complete the workflow step. After the specified period, Procore sends daily reminder emails until the step is completed.
Under Notification Recipients, choose Workflow Manager, Item Creator, and Distribution Group. This defines who receives a notification email when items move to this step in the workflow.
Choose a Decision Type & Manage Assignees
Choose one (1) decision type for each response step you create.
First Responder Decides
While this step can have multiple assignees, only a single response is needed to advance the workflow to the next step.
例
2 人の従業員にワークフロー ステップをレビューしてもらいたいとします。最初に回答を提出した従業員が、ステップの結果を決定します。たとえば、ステップをプロジェクトマネージャーまたはアシスタント プロジェクトマネージャーに割り当て、1つの回答でワークフローが次のステップに進むとします。
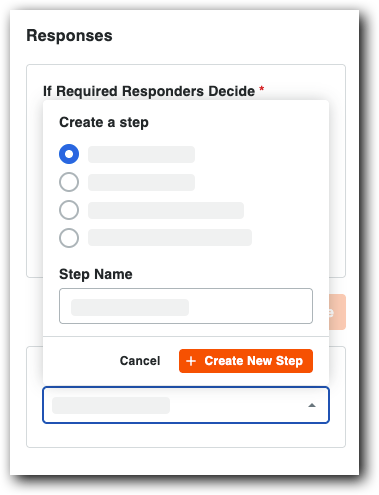
Click here to view the steps.
[担当者] カードで、[ 決定タイプ] リストから [ First Responder Decisions] を選択します。
[ 担当者を管理] をクリックします。
これにより、担当者パネルが開きます。
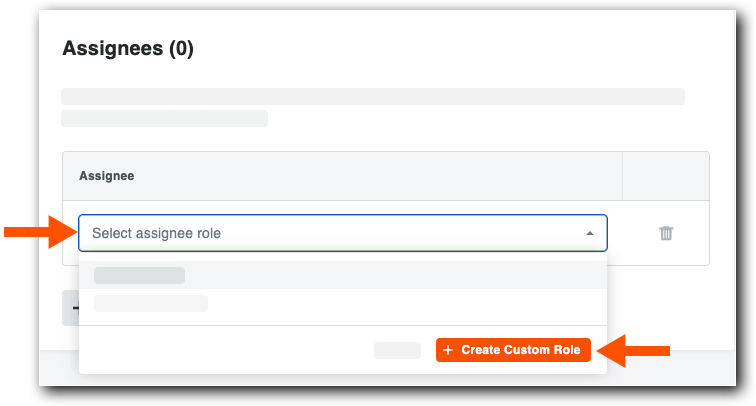
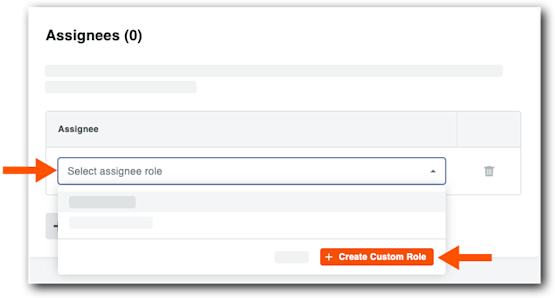
[ 担当者] で、次のオプションを1つ選択します。
[ 担当者の役割を選択 ] リストから既存の役割を選択します。
「 カスタム・ロールの作成 」をクリックし、カスタム・ロール・ラベルを入力して、「 ロールの保存」をクリックします。たとえば、「プロジェクトマネージャー」、「アシスタント プロジェクトマネージャー」、または「別の役割」と入力します。プロジェクトレベルの構成で、ユーザーをロールに割り当てます。
[ 担当者 ] パネルで、[ 保存] をクリックします。
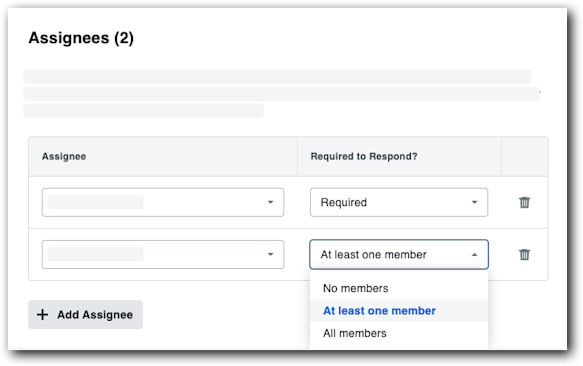
Multiple Responders Decide
While this step can have multiple assignees, various responses are possible. You can configure which combination of responses advances the workflow to the next step.
例
2 人の従業員にワークフロー ステップをレビューしてもらいたいとします。両方の従業員が回答を提出して、ステップの結果を決定する必要があります。たとえば、ステップをプロジェクトマネージャーとアシスタント プロジェクトマネージャーに割り当て、2 つの回答によってワークフローが次のステップに進むとします。