Create a Budget View

Background

In Procore, a budget view is a customizable layout that allows teams to display their project's budget data to suit their specific company needs. It acts as a tailored visual arrangement of your budget information. Key benefits of using budget views include:

  • Customization: Present the most relevant budget data for different stakeholders or purposes.

  • Insights: Gain better insights into your project's financial status.

  • Reporting: Use these views as data sources for custom budget reports.

A can create new budget views in the Company level Admin tool. Once its columns are configured, users with 'Admin' level permissions on the Budget tool can access the view directly from the Budget tool.

Things to Consider

Steps

  1. Navigate to the Company level Admin tool.

  2. Under 'Tool Settings', click Budget.

     Tip

    You can also access the 'Budget Views' page from a project's Budget tool. Click the ellipsis Icon Ellipsis Vertical icon in the top right corner while viewing the 'Budget' tab, and select Configure Budget Views from the drop-down menu.

  3. Click + Create.

     Note

    Procore provides four standard budget views named Procore Standard Budget, Blank Budget View, Non-Budgeted Source View, and Procore Labor Productivity Cost that contain various standard columns. This example shows you how to set up the view named 'Procore Standard Budget'. However, you can use any Standard Budget View as a starting point for customizing a budget view to fit your specific business needs.
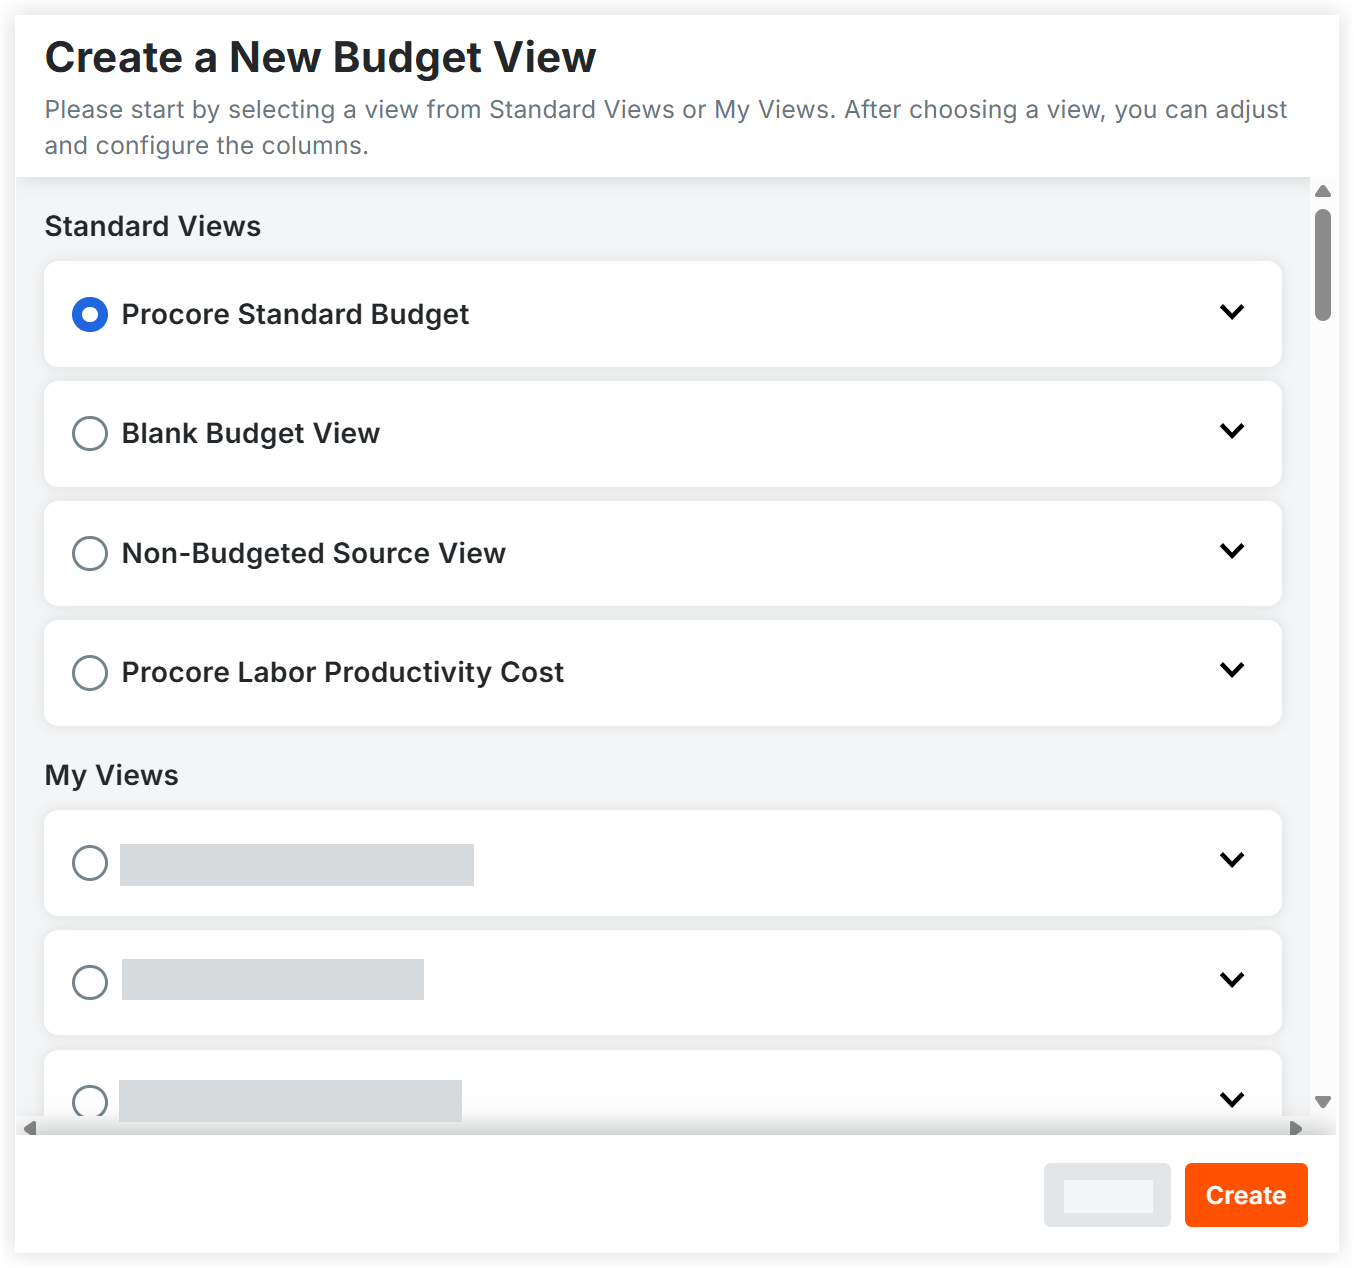
  4. In the 'Create a New Budget View' modal, select the radio button next to one of these views:
    Create a New Budget View dialog with Standard Views options and My Views section, Procore Standard Budget selected.

    • Standard Views

      • Procore Standard Budget: Default view containing standard columns such as Original Budget Amount, Approved Budget Changes, and more.

      • Blank Budget View: Minimal column set including standard columns such as Original Budget Amount, Approved Budget Changes, and Notes.

      • Non-Budgeted Source View: Displays financial sources connected to cost codes/cost types to locate unbudgeted items. This view includes standard columns such as Original Budget Amount, Approved Budget Changes, Client, All Direct Costs, Commitments, Change Event ROM, and Notes.

      • Procore Labor Productivity Cost: Contains labor cost, quantity, and rate tracking columns. This view includes standard columns such as Revised Budget, Direct Costs, Direct Costs Unit Cost, % Budget Complete, and more. It is used in the Procore default labor cost productivity report for projects.

    • My Views: Select from any existing custom views created by your company.

      Note

      If your company is using the Procore + Sage 300 CRE® integration and you want to sync your project's job cost transactions from ERP to Procore, you should add the columns described in Add the Columns for Job Cost Transaction Syncing to a Budget View for ERP Integrations to your budget view.

  5. Click Create.

  6. On the 'New Budget View' page, configure the following:

    • Header & Setup Options

      • View Name. Enter a name for the view.

      • Description. Enter a description for the view.

      • Assigned Projects. Click the hyperlink (e.g., 0/27 Projects) to assign this view to specific or all projects. See Assign a Budget View to a Procore Project.

         Note

        You can assign the view to specific projects or to all new and existing projects now by clicking the hyperlink (e.g., 0/27 Projects) under Assigned Projects. Alternatively, you can wait to assign projects after configuring the columns.

    • Preview Panel & Table Controls

      • Preview with Project. Select a project from the drop-down menu to view live sample data. See Preview a Budget or Forecasting View.

      • Display Name. Click the pencil Icon Markup Pen Pdm icon next to any column header to set a display name for this view.
        Note: The display name can be up to 50 characters long.

    • Columns Panel & Customization

    • Search. Enter a keyword in the Search box and click the search Icon Markup Search icon or press ENTER to find columns by name.

    • Column Type. Click on the drop-down list and select one or more column types to filter columns by type.

    • Reportable Column. Click to filter columns by one of the following options:

    • Show enabled columns only. Click the toggle on Icon Toggle Off icon to view only active columns.

    • Enable or Disable Columns. Click the toggle on Icon Toggle Off icon or the toggle off Icon Toggle On icon next to individual columns to show or hide them in the view. See Enable or Disable Columns in a Budget or Forecasting View.

    • Manual Load Data. Click Load Data to refresh or load column data in the preview budget table manually.

  7. Click Save.

 Note

After you create a budget view:

  • The new budget view will be accessible in the Budget Views tab and in the 'My Views' section of the 'Create a New Budget View' modal.

  • The new budget view is available to use as a starting point for creating custom budget views.

  • If you create custom reports using a budget view as a source, users who want to run the report or view its data must be granted the permissions to Set Up a Budget View for Custom Reporting.

See Also

Loading related articles...