Configure Model Manager Settings

Procore Model Manager - Beta Access & Feedback

The Model Manager (Beta) tool is exclusively available to registered beta participants. It is not available through Procore Explore. To learn more, see Beta Participant Guide.
  • To access the beta and provide feedback Show/Hide Details

    • To register: Participating companies must sign the Procore Beta Agreement. Once signed, your Procore Administrator coordinates with your Procore point of contact to enable Model Manager (Beta) on specific Procore projects.

    • To Provide Feedback During Beta: Contact your dedicated Beta program lead.

    • To report issues: Report breaking changes to Procore Customer Support. For general feedback or non-critical issues, contact your Beta program lead or Procore point of contact.

  • Notice: Procore Beta Services & Documentation Show/Hide Details

    For information about Beta Services, see the Procore Subscription Services Agreement. This documentation supports a product currently in Beta; content is actively being developed for General Availability (GA) and may be incomplete.

    • As-Is Basis: Provided solely for evaluation purposes on an "as is" basis.

    • No Warranties: Standard contractual commitments do not apply. This information carries no formal product commitments, and Procore assumes no liability for harm arising from its use.

    • Subject to Change: Procore may change, discontinue, or choose not to generally release these Beta Services at any time without notice.


Currently, only Admin permissions are available. 'Read-Only' and 'Standard' permission levels are coming soon.

Best Practice: Manage User Access with a Project Permissions Template

To manage user access as an administrator, choose an option based on your team size:

Once Model Manager (Beta) is active on your project, administrators can manage user permissions directly in the tool. Click Configure Settings. This direct method is ideal for managing just one or two users. Before you begin, make sure those users are already in the Project Directory. Your changes will save automatically.

Things to Consider

Prerequisites

Steps

  1. Navigate to the Model Manager (Beta) tool.

  2. Click Configure.

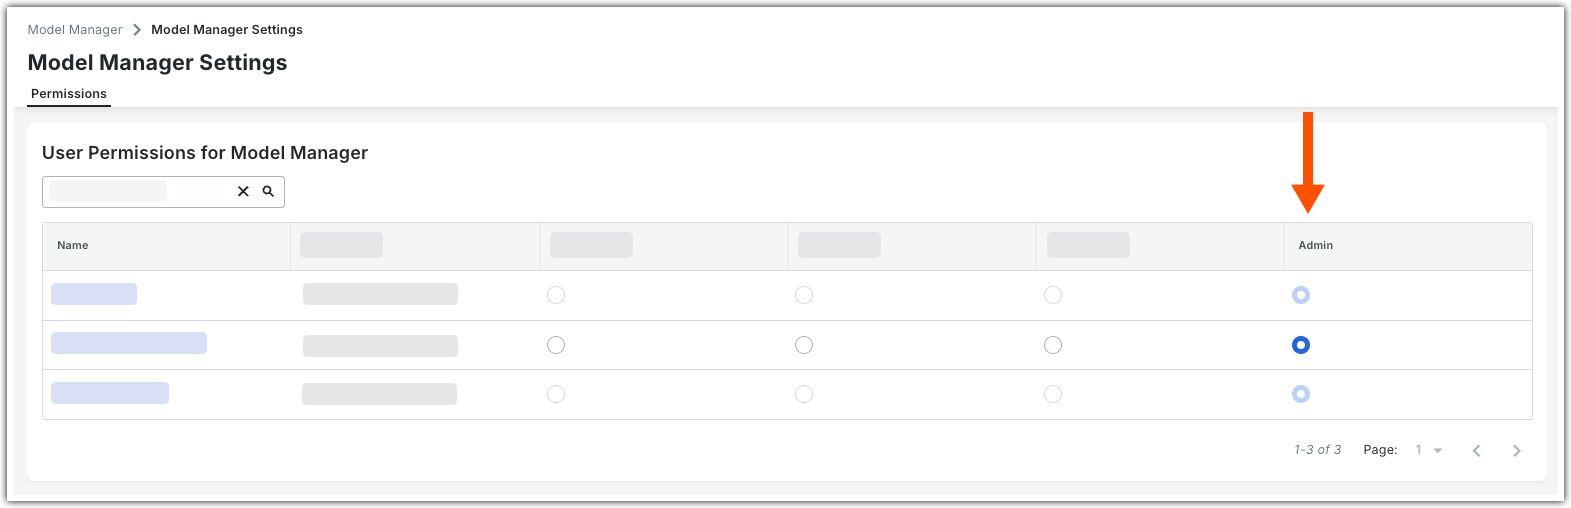
  3. In the Model Manager Settings page, click the Permissions tab.

  4. Start typing the user's name in the Search box to filter the table to match your entry.

  5. Select the project user.

  6. Grant the project user the appropriate permission level. Currently, only Admin permissions are available. 'Read-Only' and 'Standard' permission levels are coming soon.


    This image shows the Permissions tab in the Configure Settings tab of the project's Model Manager tool.

All changes save automatically.


Windows is a registered trademark of Microsoft Corporation in the United States and other countries. Google Chrome, Android, and Google Play are trademarks of Google LLC. iPhone, iPad, and App Store are trademarks or service marks of Apple Inc., registered in the U.S. and other countries and regions. iOS is a trademark or registered trademark of Cisco in the U.S. and other countries and is used under license by Apple Inc. Autodesk, AutoCAD, Civil 3D, Navisworks, and Revit are registered trademarks or trademarks of Autodesk, Inc., and/or its subsidiaries and/or affiliates in the USA and other countries. All other trademarks are the property of their respective owners.