Here, you will find answers to all your questions about Procore products and features—more easily than ever before. This is now the only support site for Procore. The previous site (support.procore.com) is now obsolete and will no longer be updated.
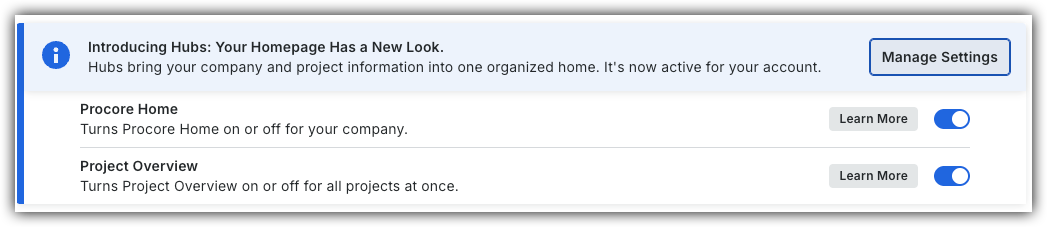
Company Administrators can switch between the new Procore Home and legacy Company Portfolio by following the below steps:
Open the Procore Home or Company Portfolio tool.
Locate the Introducing Hubs banner.
Select Manage Settings on the banner.
Toggle Procore HomeON or OFFto switch between the new view and the legacy view.
However, in early 2027, the Company Portfolio will be sunset and will no longer be available.
Background
View projects on a map in the Project List card on Company Home to assess geographic distribution and proximity across your portfolio. Visualizing project locations as pins or thumbnail images allows teams to quickly locate nearby sites and streamline site visit planning. Accessing map views and project details directly within Procore Home provides immediate spatial insights without needing to open individual project records.
Verify that project records contain an address or latitude/longitude coordinates to ensure projects display as pins or thumbnails on the map view.
Clicking a project pin zooms in on the location and opens detailed project information.
Unmapped projects without address or coordinate data can be placed directly onto the map from the map interface.
Steps
Navigate to the company's Procore Home tool.
Click the ProjectList tab.
Click the Map icon to switch from table view to map view.
Select the View Project icon.
Note: If a project has no address listed, the View Project icon will not appear.
Filter or customize the project list display:
Click the List drop-down menu and select All, Mapped, or Unmapped.
Click the Configure icon menu and select Thumbnail Pins or Icon Pins.
Click Filter to select specific project attributes such as stage, department, or custom field values. For more information, see Filter Portfolio Card Views.
Search the map:
Enter a street address or latitude/longitude coordinates into the location search bar to pan the map to a specific location.
Click the Current Location icon to center the map on your physical location.
Filter projects by spatial boundaries:
Click Map Filter and select In View to display projects visible within the current map window.
Click MapFilter and select In Geofence to draw custom boundaries.
Click points on the map to construct the geofence perimeter.
Click the starting point to close the shape and enclose the target area.
Click Redraw to clear boundary points and start over if needed.
Click any project pin or thumbnail on the map to zoom in and view project details.
 or OFF
 to switch between the new view and the legacy view.

 icon to switch from table view to map view.
 icon.
 icon menu and select Thumbnail Pins or Icon Pins.