Create Saved Views in the Portfolio Hub Card

New Version Available

Procore Home has replaced the legacy Company Portfolio page and is enabled by default. Learn more about the difference between the legacy Company Portfolio page and the new Procore Home.

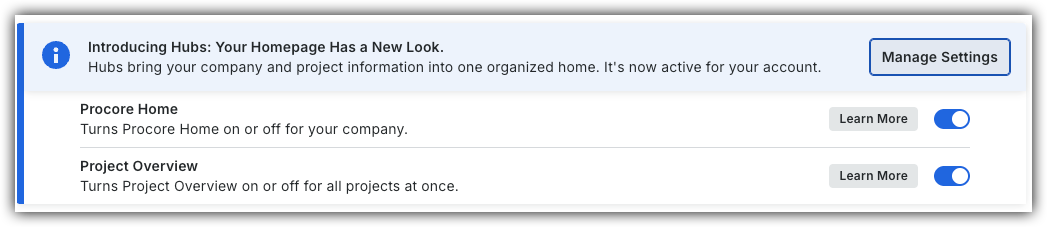
Company Administrators can switch between the new Procore Home and legacy Company Portfolio by following the below steps:

  1. Open the Procore Home or Company Portfolio tool.

  2. Locate the Introducing Hubs banner.

  3. Select Manage Settings on the banner.

  4. Toggle Procore Home ON Icon Toggle On or OFFIcon Toggle Offto switch between the new view and the legacy view.

However, in early 2027, the Company Portfolio will be sunset and will no longer be available.

Procore Hubs announcement banner with Manage Settings button and toggles for Procore Home and Project Overview features.

Background

Create saved views in the Company Portfolio Hub Card to quickly access preferred filters, groupings, and column layouts without reconfiguring table settings. Saving customized table configurations allows team members to toggle between company wide workflows and individual views instantly. Publishing shared views standardizes reporting and aligns project data across the organization.
Things to Consider

  • Required User Permissions on the company's Procore Home tool.

  • Additional Information:

    • Personal views remain visible only to the creator, while company views are accessible to all account users.

    • Saved views automatically capture applied table filters, groupings, column selections, and column ordering.

    • Portfolio saved views apply strictly at the company level; project level view options are not available.

Steps

  1. Navigate to the company's Procore Home tool.

  2. Click the Portfolio tab.

  3. Click the Icon Show Saved ViewsViews button.

  4. Adjust the table layout settings as needed. See Configure Columns in the Portfolio Hub Card.

  5. Click + Create.

    Portfolio interface showing Saved Views panel with Company and Personal Views, alongside a filtered project list with an Active: Yes filter applied.

  6. In the Create Saved View window, enter the following information:
    An asterisk (*) below indicates a required field.

    • Name*: Enter a descriptive name for the view.

    • Description: Enter additional details for the view.

    • View Level: Select the visibility level for the view.

      • Personal View: The view is only visible to you.

      • Company View: The view is available across all projects in the company account.

  7. Click Create.

See Also

Loading related articles...