Reinstall the QuickBooks® Web Connector on a Desktop or Server for Procore
Background
Reinstalling the QuickBooks® Web Connector restores the data connection between QuickBooks® Desktop and Procore to ensure accurate financial synchronization. Updating to the latest configuration prevents data duplication and keeps project financial records aligned across both platforms.
Things to Consider
Required User Permissions:
'Admin' level permissions to QuickBooks® Desktop.
Additional Information:
Complete the download and installation on the designated host machine where QuickBooks® Desktop and the QuickBooks® Web Connector reside.
There can only be one QuickBooks® Web Connector per Procore company file.
Delete all existing .qwc files from your system before installing the new file, as inactive or duplicate Web Connector files cause sync errors and duplicated data.
QuickBooks® Desktop US versions include Web Connector natively, whereas QuickBooks® Desktop Canada requires downloading and installing the Web Connector application separately.
Contact ERP Support to receive a .qwc file for your QuickBooks® Web Connector.
Prerequisites
Log in to the host computer running QuickBooks® Desktop and the QuickBooks® Web Connector as an administrator.
Obtain an updated
.qwcfile directly from Procore's ERP Support.If moving the QuickBooks® Web Connector from one location to another, click Remove in the QuickBooks Web Connector interface to remove it before deleting the
.qwcfile from the old location.

Steps
Contact Procore's ERP Support to request the new
.qwcintegration file.Move the received
.qwcfile to the desktop of the computer running the QuickBooks® Web Connector.Log in to QuickBooks® Desktop as an Administrator in Single User Mode.
Press F2 (or CTRL + 1) on your keyboard to open the Product Information window.
Copy the full file path displayed after Location: under the FILE INFORMATION section.
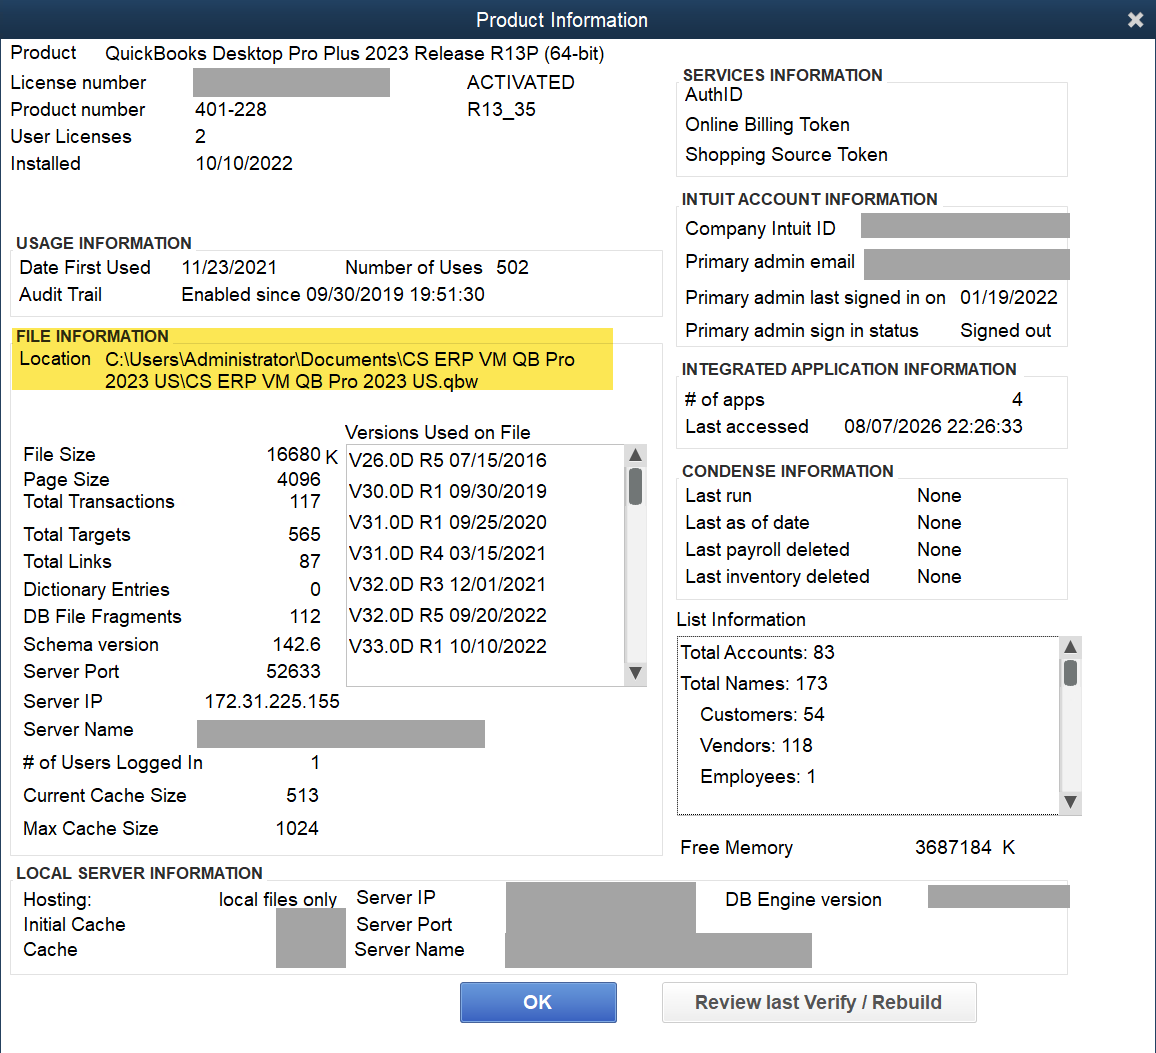
Send the copied location path to ERP Support to update the integration settings.
Click File > App Management > Update Web Services in QuickBooks to open the QuickBooks Web Connector window.
Click Add an Application and navigate to the desktop where the
.qwcfile is saved.Select
.qwcand click Open.Click OK on the Authorize New Web Services pop-up window.
Complete the certificate authorization process if prompted:
Click the radio button next to Yes, always allow access even if QuickBooks is not running.
Click Yes on the pop-up prompt.
Select Web Connector from the Login as drop-down menu.
Click OK.
If you suspect the Web Connector password changed or you did change it during reinstallation, contact ERP Support to update your backend configuration.
Click Yes when prompted to save the password.
Mark the checkbox next to the Procore Web Connector.
Click Update Selected to run the QuickBooks Web Connector and test the configuration.

See Also
Loading related articles...