Verify Dimensions & Spatial Relationships with the Point to Point Tool

Procore Model Manager - Beta Access & Feedback

The Model Manager (Beta) tool is exclusively available to registered beta participants. It is not available through Procore Explore. To learn more, see Beta Participant Guide.

  • To access the beta and provide feedback Show/Hide Details

    • To register: Participating companies must sign the Procore Beta Agreement. Once signed, your Procore Administrator coordinates with your Procore point of contact to enable Model Manager (Beta) on specific Procore projects.

    • To Provide Feedback During Beta: Contact your dedicated Beta program lead.

    • To report issues: Report breaking changes to Procore Customer Support. For general feedback or non-critical issues, contact your Beta program lead or Procore point of contact.

  • Notice: Procore Beta Services & Documentation Show/Hide Details

    For information about Beta Services, see the Procore Subscription Services Agreement. This documentation supports a product currently in Beta; content is actively being developed for General Availability (GA) and may be incomplete.

    • As-Is Basis: Provided solely for evaluation purposes on an "as is" basis.

    • No Warranties: Standard contractual commitments do not apply. This information carries no formal product commitments, and Procore assumes no liability for harm arising from its use.

    • Subject to Change: Procore may change, discontinue, or choose not to generally release these Beta Services at any time without notice.


Currently, only Admin permissions are available. 'Read-Only' and 'Standard' permission levels are coming soon.
Use the Point to Point tool to verify spatial relationships in your 3D models. By selecting specific edges or lines, you can generate precise measurement strings that help you understand the exact dimensions and orientations of the model's elements.

Things to Consider

Prerequisites

Steps

  1. Launch the Procore Mobile app on your device.

  2. Go to the desired Procore project.

  3. Tap the Model Manager tool.

  4. Open a model or project view.

  5. Click Measurements .

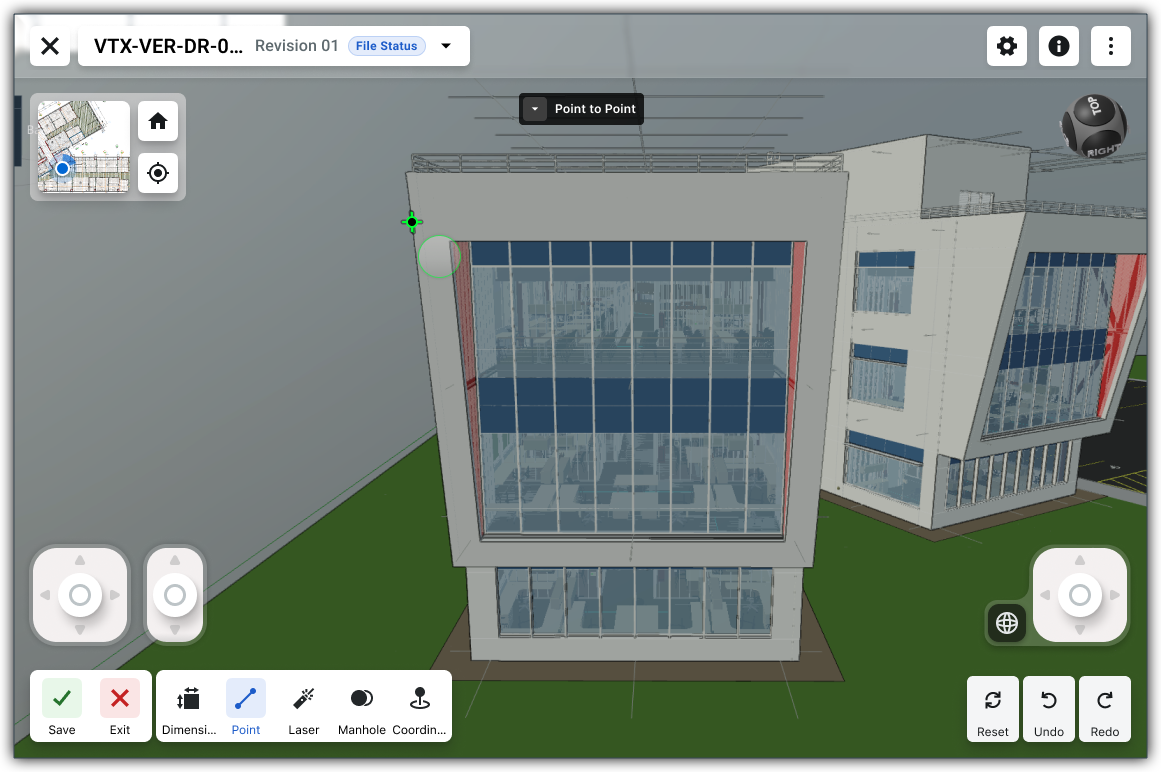
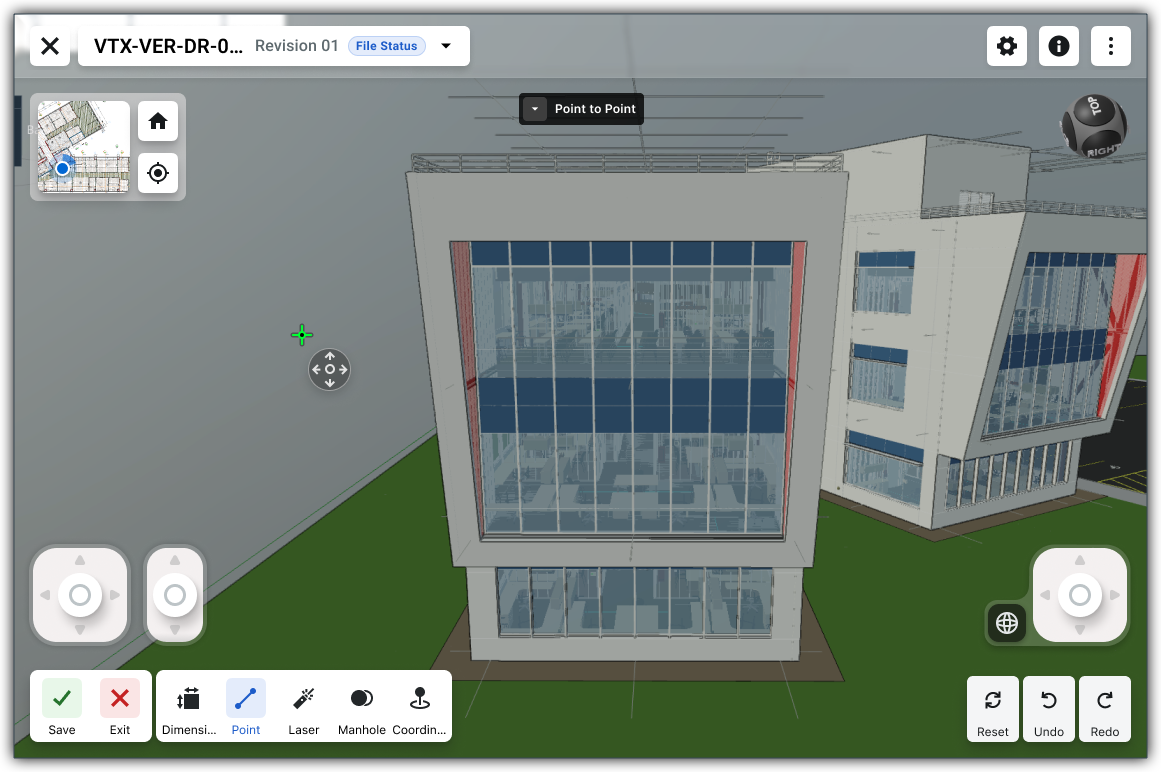
  6. Click Point to Point to activate the mode. The cursor changes to a target shape and turns green. This image shows the Next-Gen Viewer on Mobile with the Point-to-Point tool activated in its initial state.

    Tip: Managing Your Changes

    Need to save your progress or exit without saving? To learn how, see How can I tell which tool is active in the Model Manager's right toolbar?

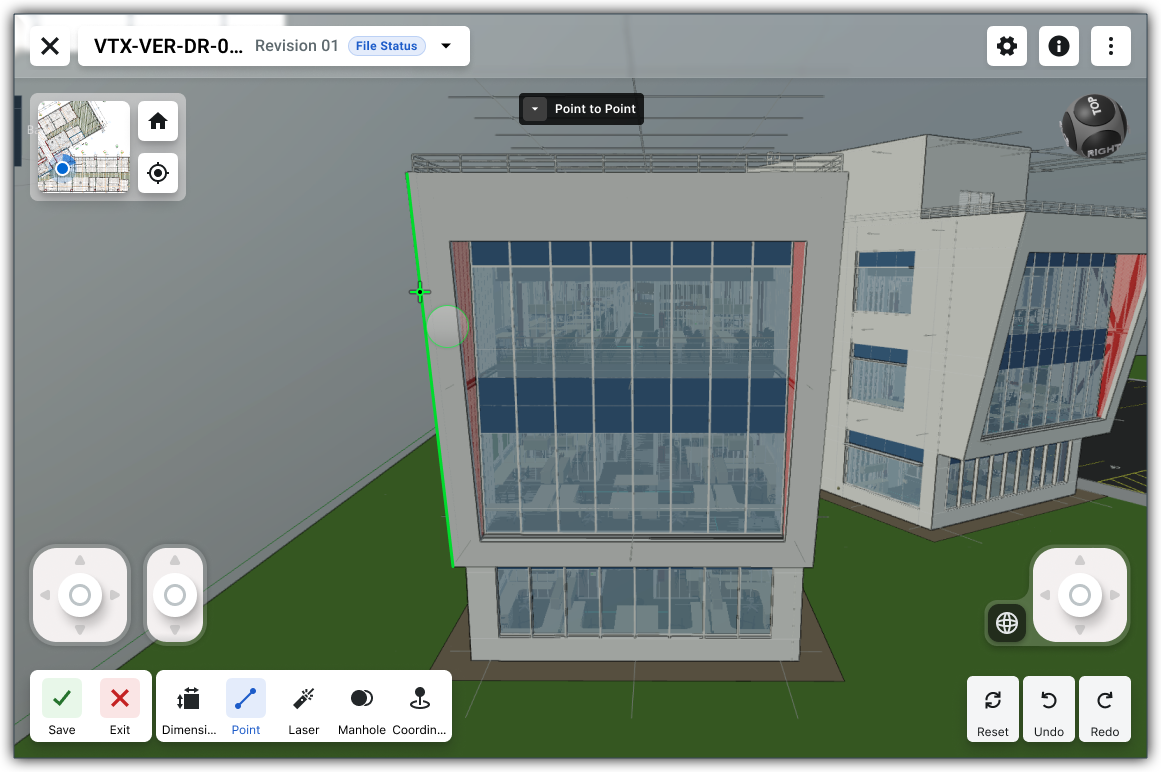
  7. Hover on an edge in the 3D space to show the pointer and dashed line.
    This image shows the Point-to-Point tool in the Model Manager Next-Gen Viewer with the line hovering on the edge of a building in a 3D model.

  8. Lift your finger to place the first point. This image shows the first point placed on an edge of a building in a 3D Model when using the Point to Point tool in the Next Gen Viewer in the Model Manager tool

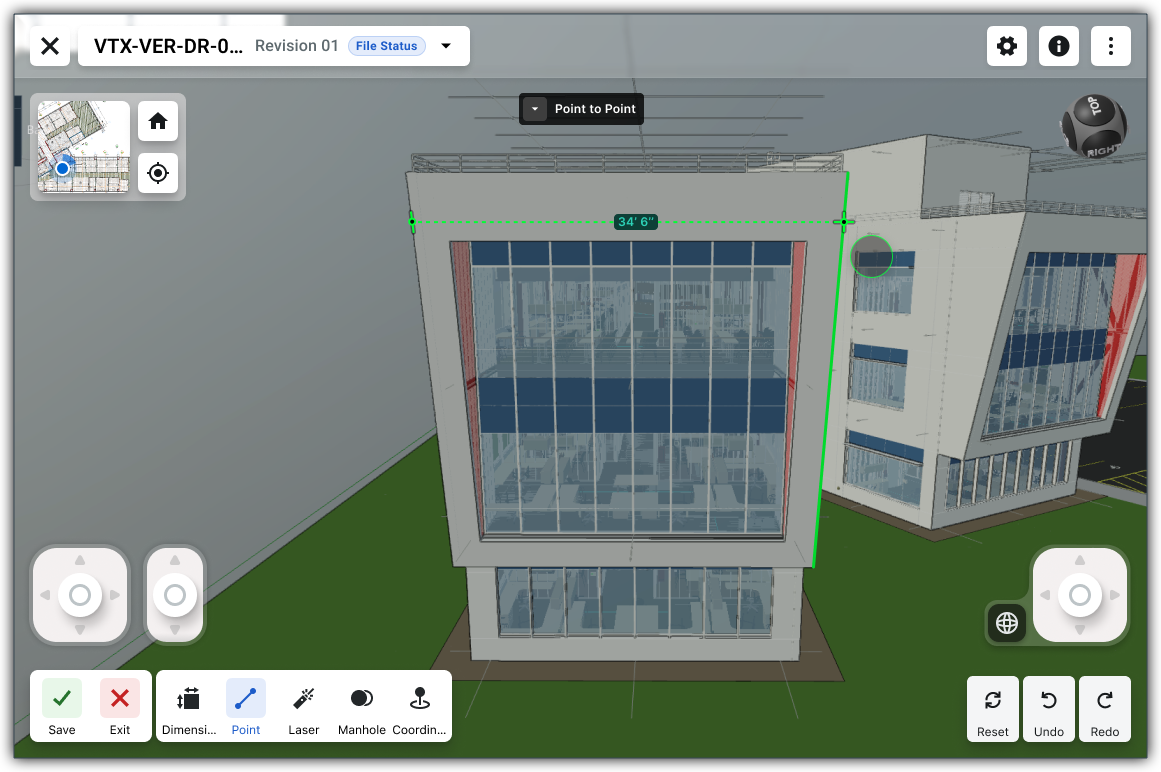
  9. With the point pinned to the edge, drag the cursor with your finger held down and hover to the opposite edge. This image shows a Point to Point measurement for the face of a building in a 3D model in the Next Gen Viewer of the Model Manager tool.

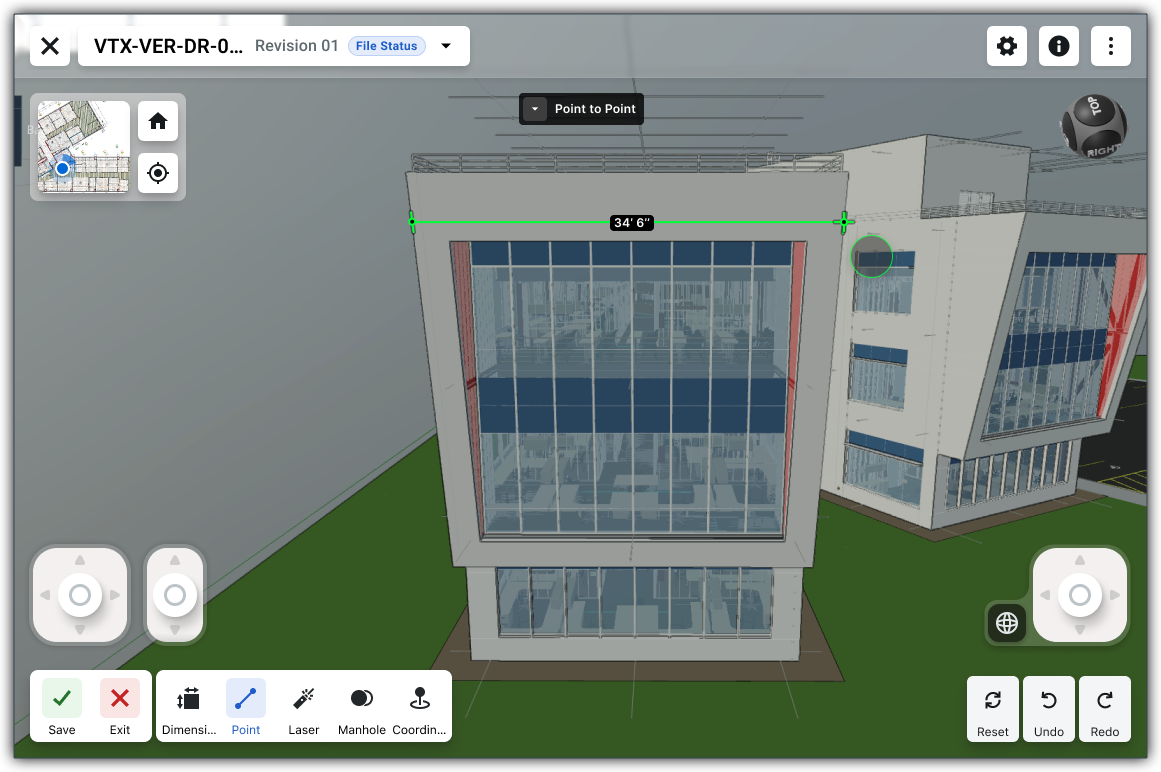
  10. When you see the pointer and dashed line, lift your finger to place the second point. The dashed line becomes a solid line to represent the single measurement. This image shows a single complete measurement with the Point to Point tool in the Next Gen Viewer of the Model Manager tool.

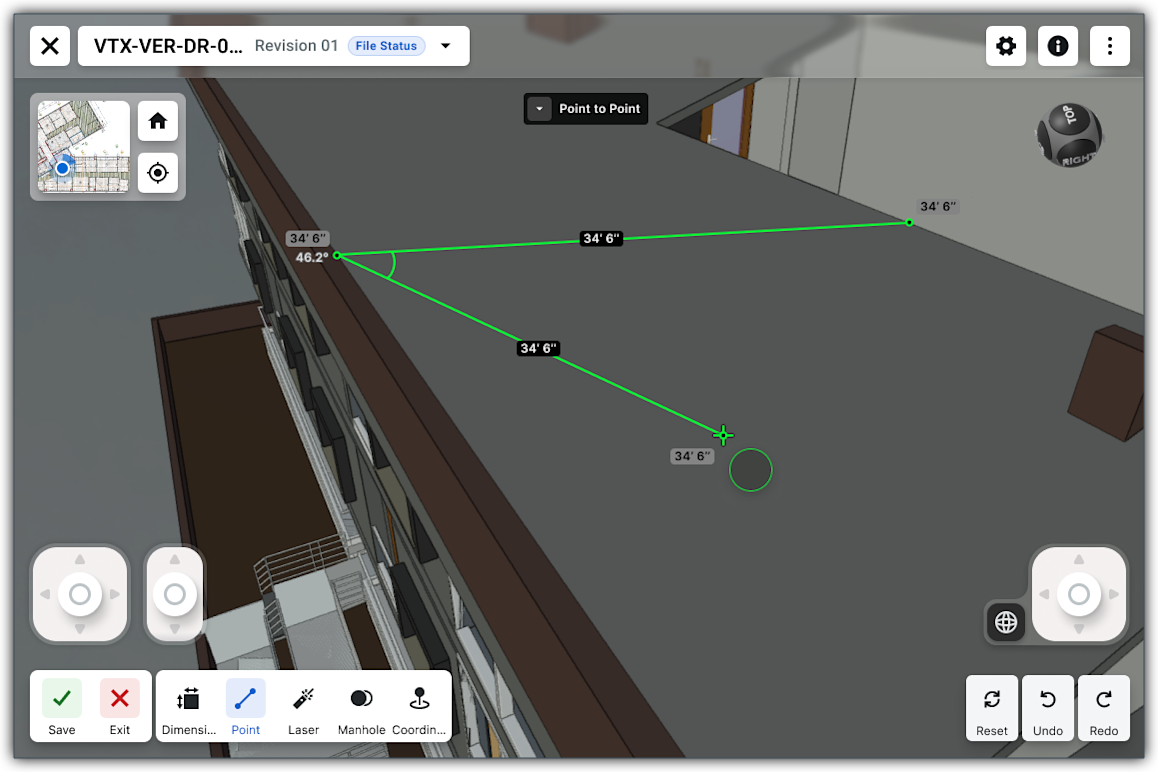
  11. Optional. Hold down and drag to find your next point and lift your finger to place the next point. These measurements display: This image shows a second measurement being taken with the Point to Point tool in the Next Gen Viewer of the Model Manager tool.

    • Length and slope of each line

    • Z-coordinate of each point

    • Corner angles

    • Total segment length

  12. Optional. Additional options:

    • Adjust a point measurement. Hover over a point. When the hand appears, drag the point to a new location.

    • Delete a single dimension line. Tap the X next to the line.

    • Delete all dimension lines. Hover over the measurement and tap the Trash Can icon.

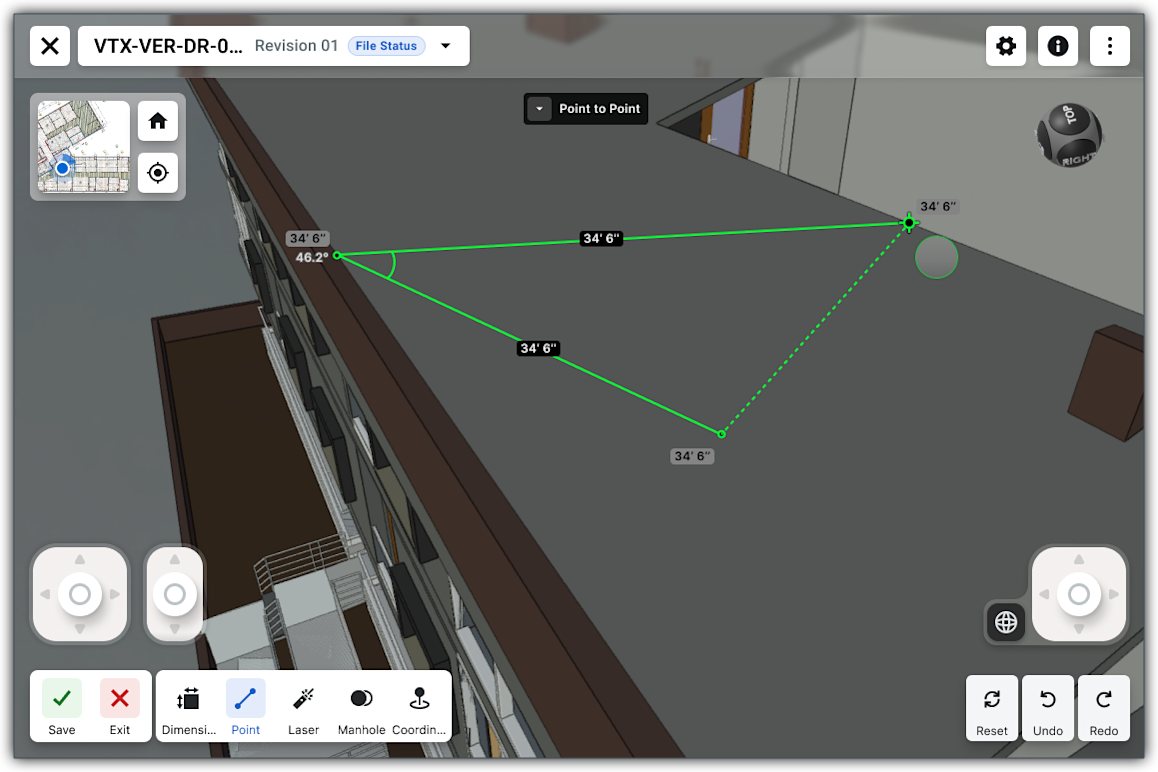
  13. When ready to place a closing measurement, hold down and drag again. A dashed line appears and the closing circle enlarges when hovering over a closing measurement. This image shows a closing measurement with a larger closing circle for the cursor in the Next Gen Viewer of the Model Manager tool.

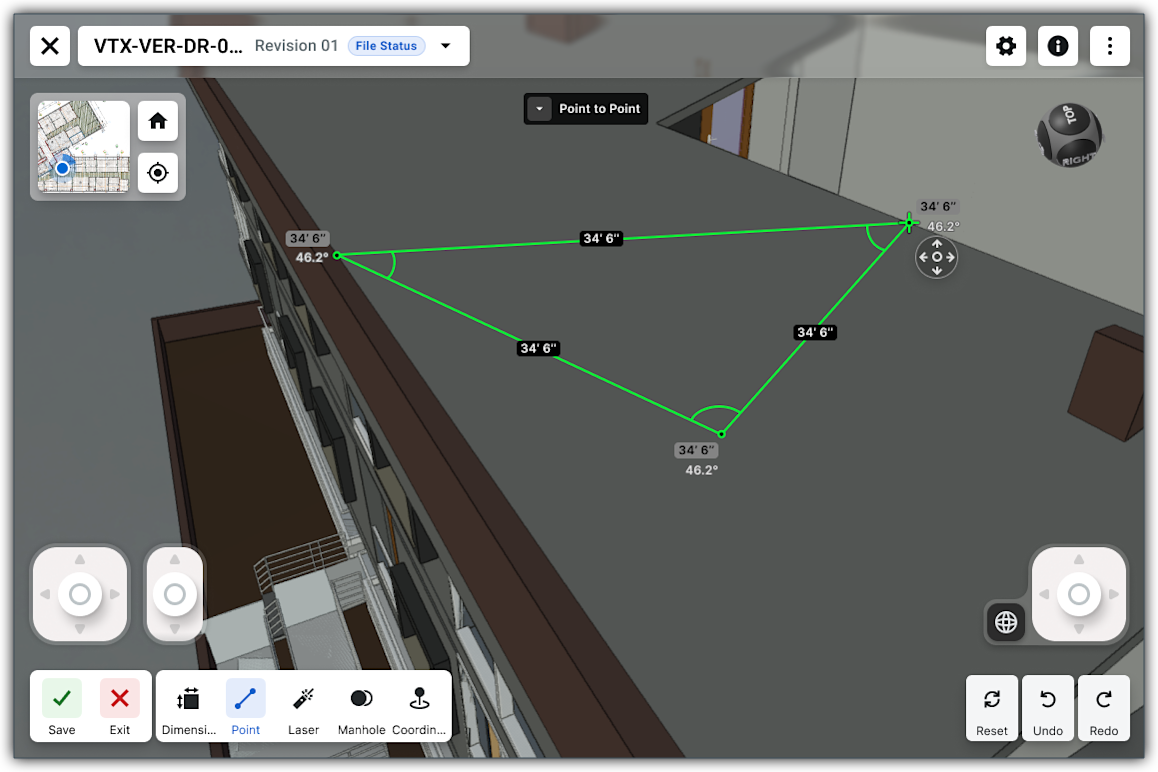
  14. Lift your finger to place the closing measurement. This shows a closed measurement taken with the Point to Point tool in the Next Gen Viewer of the Model Manager tool

  15. When finished, tap This shows the Save and Exit button in the right toolbar in the viewer in the Model Manager tool Save.


Windows is a registered trademark of Microsoft Corporation in the United States and other countries. Google Chrome, Android, and Google Play are trademarks of Google LLC. iPhone, iPad, and App Store are trademarks or service marks of Apple Inc., registered in the U.S. and other countries and regions. iOS is a trademark or registered trademark of Cisco in the U.S. and other countries and is used under license by Apple Inc. Autodesk, AutoCAD, Civil 3D, Navisworks, and Revit are registered trademarks or trademarks of Autodesk, Inc., and/or its subsidiaries and/or affiliates in the USA and other countries. All other trademarks are the property of their respective owners.