Informations complètes pour les documents dans l’outil de gestion de documents

Disponibilité régionale

L’outil de gestion de documents est disponible dans certains pays. Il n’est pas encore disponible pour les comptes Procore aux États-Unis. Pour en savoir plus, veuillez contacter votre point de contact Procore.

Arrière-plan

Une fois que les documents ont été chargés dans l’outil Gestion de documents, tous les attributs manquants doivent être remplis avant de pouvoir être soumis et affichés dans l’onglet Tous les documents. Des champs supplémentaires peuvent être obligatoires en fonction des paramètres du projet et de l’entreprise.

Pour plus d’informations sur chaque champ, voir Quels sont les différents champs de l’outil Gestion de documents ?

Éléments à prendre en compte

Conditions préalables

Steps

  1. Navigate to the project's Document Management tool.

  2. You can complete information for documents in the following ways:

    • From the Table

      • Bulk Edit Information

    • From a File

    • From the Document Viewer

 Note
  • Au fur et à mesure que vous remplissez les champs, la colonne « Nom » commence à se remplir en fonction des données saisies.

  • Pour plus d’informations sur chaque champ, voir Quels sont les différents champs de l’outil Gestion de documents ?

  • Les champs « Nom », « Type », « Statut » et « Version » sont toujours obligatoires. D’autres champs peuvent être masqués ou obligatoires en fonction des paramètres du projet et du compte.

  • Si vous souhaitez modifier les informations de plusieurs documents à la fois, consultez la section Modifier par lot les informations des documents ci-dessous.

From the Table

  1. Click the Uploads tab.Pdm Table View Uploads

  2. Fill out required attributes by clicking into fields to enter information or to search for desired values. Scroll to the right as necessary to access additional columns for data entry.

     Note

    You can hover over the 'Missing Attributes' message in the 'Ready to Submit' column to view which fields still need to be filled out before a document can be submitted.

    Tip! You can use keyboard shortcuts to quickly move through the table:

    • Use the left, right, up, and down ARROW keys to move around to different fields.

    • While a field is selected, use the TAB key to move to the right, and SHIFT+TAB to move to the left.

    • Press ENTER or RETURN to select the field so that you can type or select information.

    • Use the ARROW keys to select options from drop-down menus, and press ENTER or RETURN again to confirm.

  3. If you have the 'Submit New Files' permission and you are ready to submit the documents, click Submit. See Submit Documents in the Document Management Tool.
    Note: If a document has an approval workflow, that workflow starts and the document shows up in the 'In Review' collection.

Bulk Edit Information for Documents

  1. Mark the checkboxes next to the files that you want to edit in bulk.
    Tip!

    • If you want to select all files at once, mark the checkbox at the top of the table.

    • If you want to select a range of rows at once, hold down the SHIFT key on your keyboard and mark the necessary checkboxes.

  2. Click the edit Icon Edit2 icon. Bulk Edit
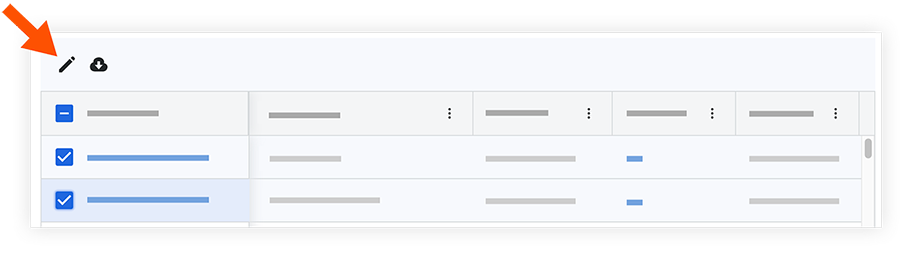
This opens the Edit Document Attributes side panel.

  3. Click into a field to enter information. See What are the different fields in the Document Management tool?

  4. After you complete all necessary fields, click Apply.

  5. If you have the 'Submit New Files' permission and you are ready to submit the documents, click Submit.
    This moves the selected files from the 'Uploads' tab.

From a File

Complete missing information in a .csv or .xlsx file and then import that into the Document Management tool.
Note: This method will not import the 'Type' field.

  1. Click the Uploads tab.

  2. Click Import Metadata.
    Note: The uploads tab must have at least one file.

  3. Click the link to download the metadata table template.

  4. Open the downloaded template and fill in all required fields and any desired fields.

  5. In the 'Import Metadata' window, upload the finished .csv or .xlsx file by clicking Attach File.

  6. Click Import.

  7. All fields in the uploads tab are automatically filled in from the imported file, and any errors are highlighted for easy correction.
    Note: Fields completed from the imported file have a spreadsheet Pdm Complete Info Documents icon in the cell. If the field's value is ever edited, the icon disappears.

  8. If you have the 'Submit New Files' permission and you are ready to submit the documents, click Submit. See Submit Documents in the Document Management Tool.
    Note: If a document has an approval workflow, that workflow starts and the document shows up in the 'In Review' collection.

From the Document Viewer

 Pourboire

Si vous venez de charger des documents et que la fenêtre « Chargements » est toujours ouverte, vous pouvez passer la souris sur l’icône de coche verte d’un document et cliquer sur Réviser pour l’ouvrir dans la visionneuse.

  1. Click the document that you want to open in the viewer.
    The document loads and the Information side panel opens. You can also click the info Icon Info3 icon to open the panel.

  2. Click into a field to enter information. See What are the different fields in the Document Management tool?
    Your selection saves when you click out of the field.

  3. Continue to fill out information for fields as necessary.

  4. If you have the 'Submit New Files' permission and you are ready to submit the documents, click Submit. Otherwise, click Next.
    The viewer will automatically load the next document. You can use the arrows or drop-down menu at the top of the viewer to open a different document.

  5. If you want to close the viewer and return to all documents, click Close.

Note

If a field is not automatically populated, check for a warning icon. Hovering over the icon provides specific error details, such as "Unsupported file format" or "Inactive field values," allowing you to correct the data before completing the upload.

Prochaines étapes

See Also

Loading related articles...