Esse site não foi ainda lançado completamente no seu local preferido
A única página operacional no Site de Suporte V2 no idioma preferencial é a página da biblioteca de vídeos. O lançamento do site completo será em breve.
Está procurando outro conteúdo? Volte ao Site de Suporte V1.
The Model Manager (Beta) tool is exclusively available to registered beta participants. It is not available through Procore Explore. To learn more, see Beta Participant Guide.
To access the beta and provide feedbackShow/Hide Details
To register: Participating companies must sign the Procore Beta Agreement. Once signed, your Procore Administrator coordinates with your Procore point of contact to enable Model Manager (Beta) on specific Procore projects.
To Provide Feedback During Beta: Contact your dedicated Beta program lead.
To report issues: Report breaking changes to Procore Customer Support. For general feedback or non-critical issues, contact your Beta program lead or Procore point of contact.
For information about Beta Services, see the Procore Subscription Services Agreement. This documentation supports a product currently in Beta; content is actively being developed for General Availability (GA) and may be incomplete.
As-Is Basis: Provided solely for evaluation purposes on an "as is" basis.
No Warranties: Standard contractual commitments do not apply. This information carries no formal product commitments, and Procore assumes no liability for harm arising from its use.
Subject to Change: Procore may change, discontinue, or choose not to generally release these Beta Services at any time without notice.
Currently, only Admin permissions are available. 'Read-Only' and 'Standard' permission levels are coming soon.
The Next-Gen Viewer provides a customizable environment for exploring your project's federated project model and discipline files. By adjusting the field of view and switching between projection modes, you can gain a more realistic sense of spatial depth or remove distortion for technical verification. It also offers features that allow you to navigate complex site orientations and verify alignments with greater precision.
The FOV setting dictates the "focal length" of your virtual lens. In the Next-Gen Viewer, this is measured in degrees.
Feature
Behavior
Default setting
The default setting is 65° for new views created within the platform.
Imported views
Imported viewpoints from Navisworks® or Revit® retain their original FOV.
Distortion
High FOV (90°+) may cause a "fish-eye" effect, while low FOV (45°) may feel "zoomed in." The viewer allows these to persist if that is how the view was saved.
Adjustments
If a view looks distorted, Procore recommends resetting the Home view in Navisworks to 65° and republishing to the document repository.
Projection Modes
Projection modes determine how 3D space is interpreted within the viewer. By switching modes, you can choose the view that best suits your current task—whether you need a realistic sense of depth for navigation or an undistorted view for verifying technical alignments.
Perspective (3D): This is the default mode. It mimics the human eye by making objects further away appear smaller. This provides spatial depth, making it ideal for first-person "fly" walkthroughs and general site orientation.
Orthographic (2D): This mode removes depth distortion. Every object maintains its true scale regardless of its distance from the camera. This is essential for verifying vertical alignments, checking clearances between systems, and producing elevation screenshots.
Example
See these examples to view the difference between projection modes.
Perspective Mode (Default)
Perspective mode mimics the human eye, making objects that are further away appear smaller. This creates a sense of depth that is ideal for "flying" through a site or orienting yourself within the 3D environment.
Orthographic Mode
Orthographic mode removes depth distortion so every object maintains its true scale, regardless of its distance from the camera. This is a helpful tool for checking if systems are vertically aligned or for capturing clear elevation views without the distortion of a vanishing point.
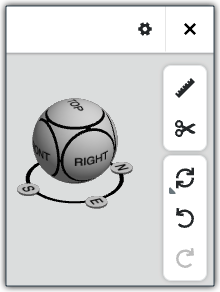
The Navigation Sphere allows you to manipulate the 3D orientation of a model by clicking its faces (such as Top, Front, or Right), corners, or edges. This action snaps the camera to a specific perspective. The Navigation Sphere is the primary tool for perspective management and works great with Orthographic mode. You can also click and drag the sphere to reposition it within the viewer.
On the left side of the Next-Gen Viewer is a persistent, vertical toolbar that puts navigation and frequently used design coordination tools at your fingertips.
The toolbar next to the Navigation Sphere on the right side of the page Next-Gen Viewer helps to control the visual environment and your interactions with the model. While the left toolbar deals with object data, the right toolbar helps you manipulate the model.
The Context menu provides a centralized way to control how you view and interact with 3D model data. By using these tools, you can perform actions to quickly declutter your view, find similar items across the entire project, and inspect complex internal details without losing the overall context of the model.
Windows is a registered trademark of Microsoft Corporation in the United States and other countries. Google Chrome, Android, and Google Play are trademarks of Google LLC. iPhone, iPad, and App Store are trademarks or service marks of Apple Inc., registered in the U.S. and other countries and regions. iOS is a trademark or registered trademark of Cisco in the U.S. and other countries and is used under license by Apple Inc. Autodesk, AutoCAD, Civil 3D, Navisworks, and Revit are registered trademarks or trademarks of Autodesk, Inc., and/or its subsidiaries and/or affiliates in the USA and other countries. All other trademarks are the property of their respective owners.