Create Disbursements
Review Invoices
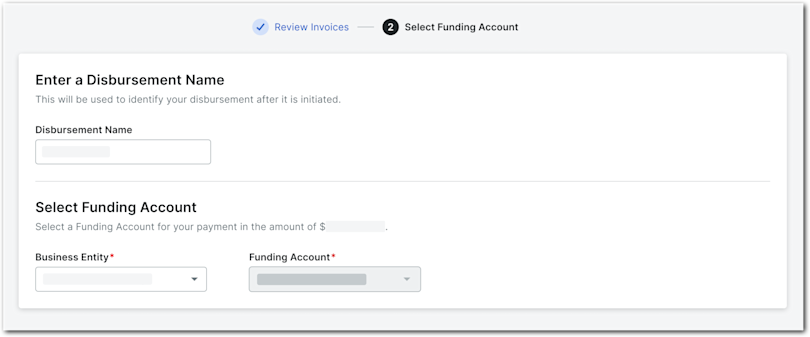
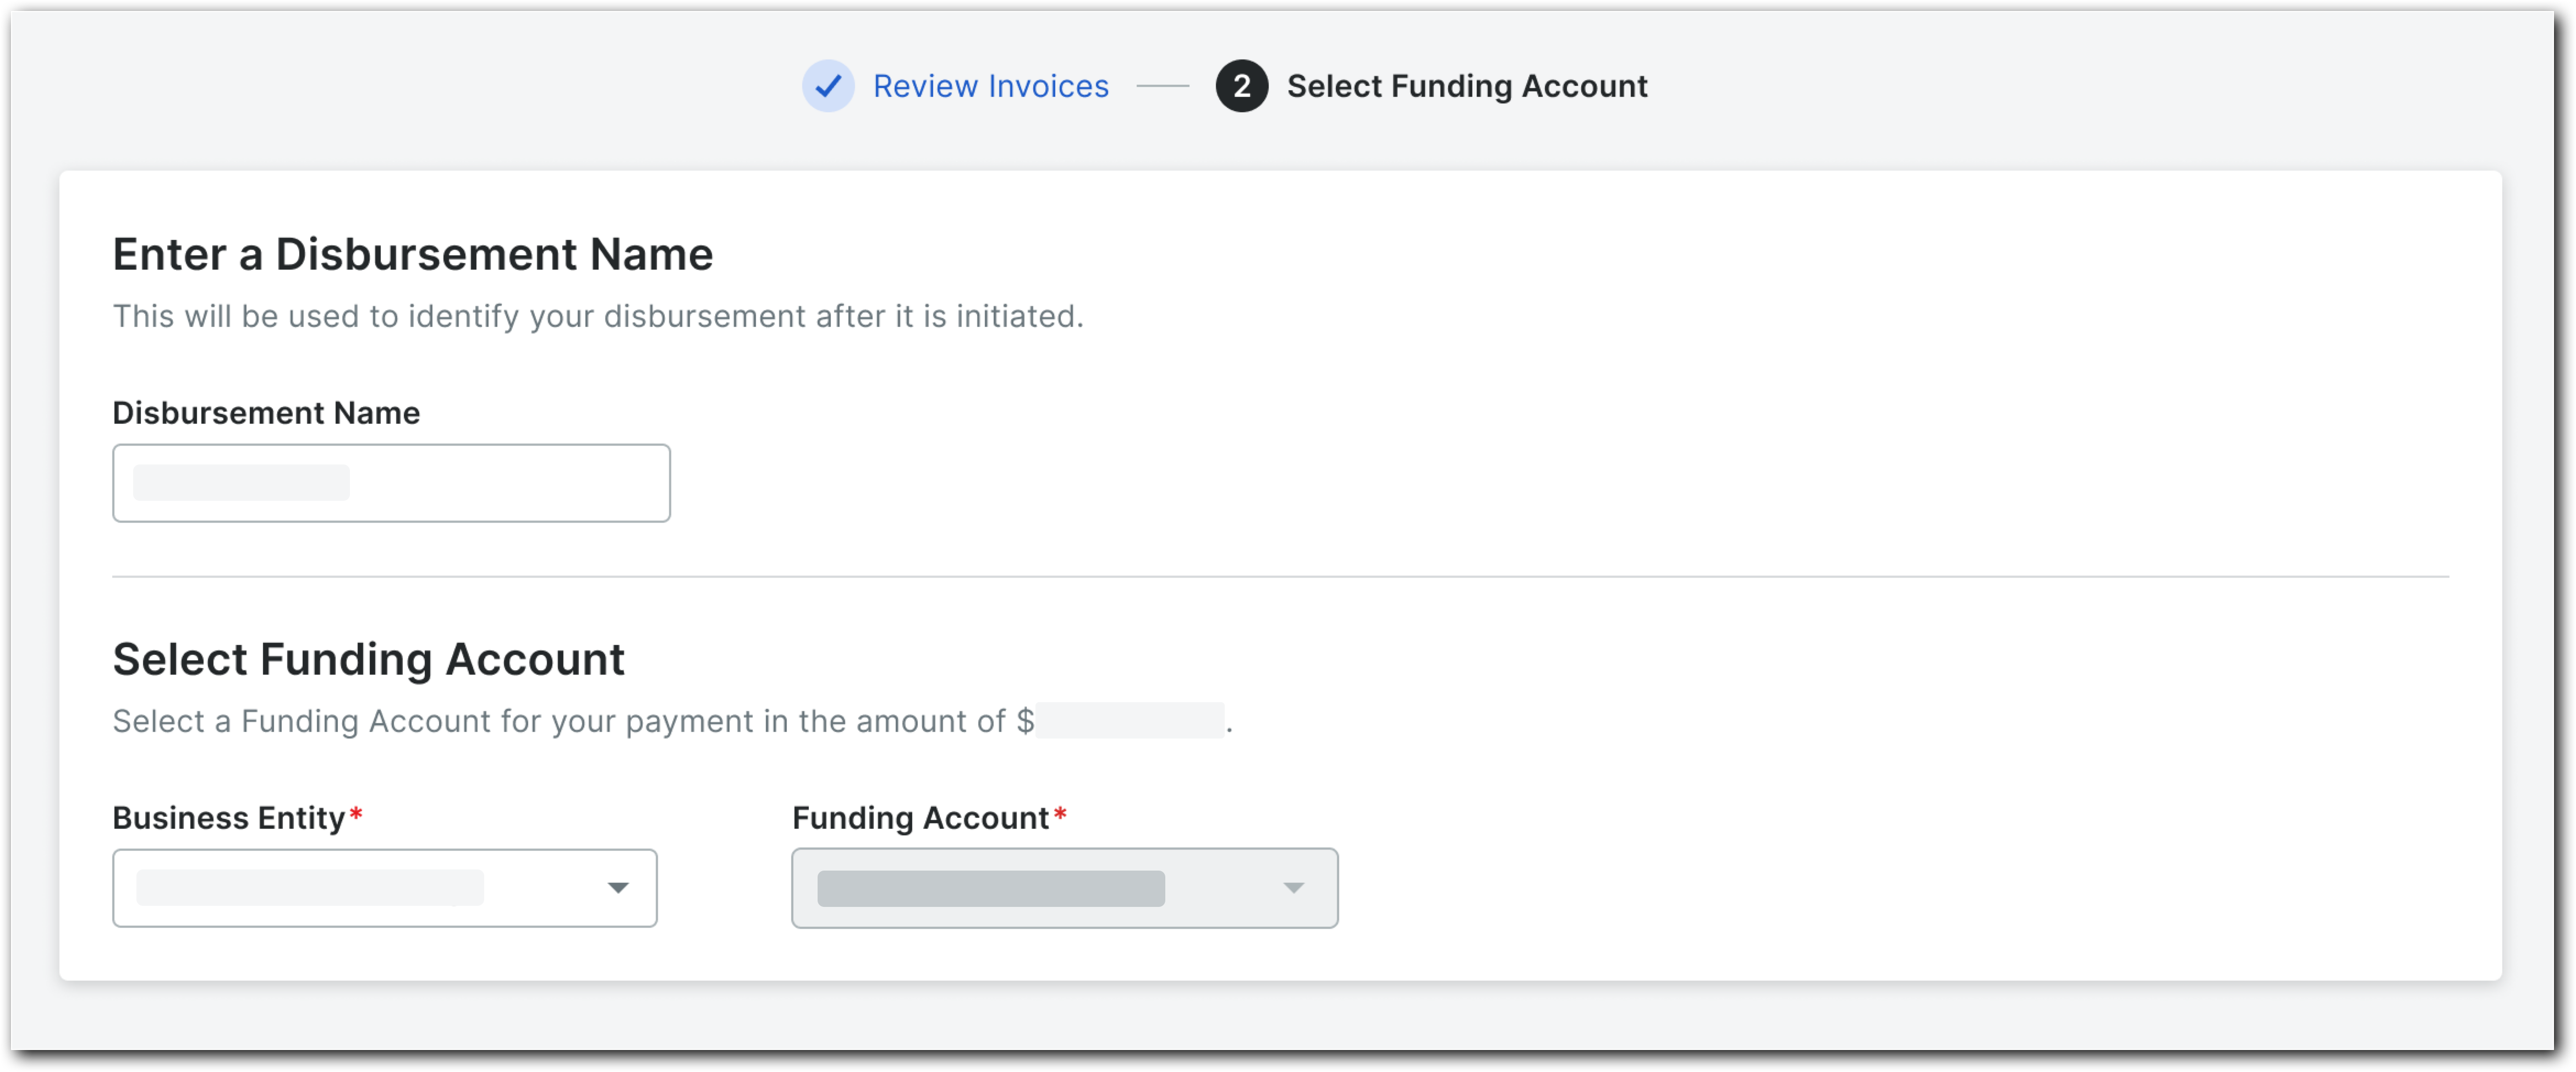
Select Business Entity & Funding Account
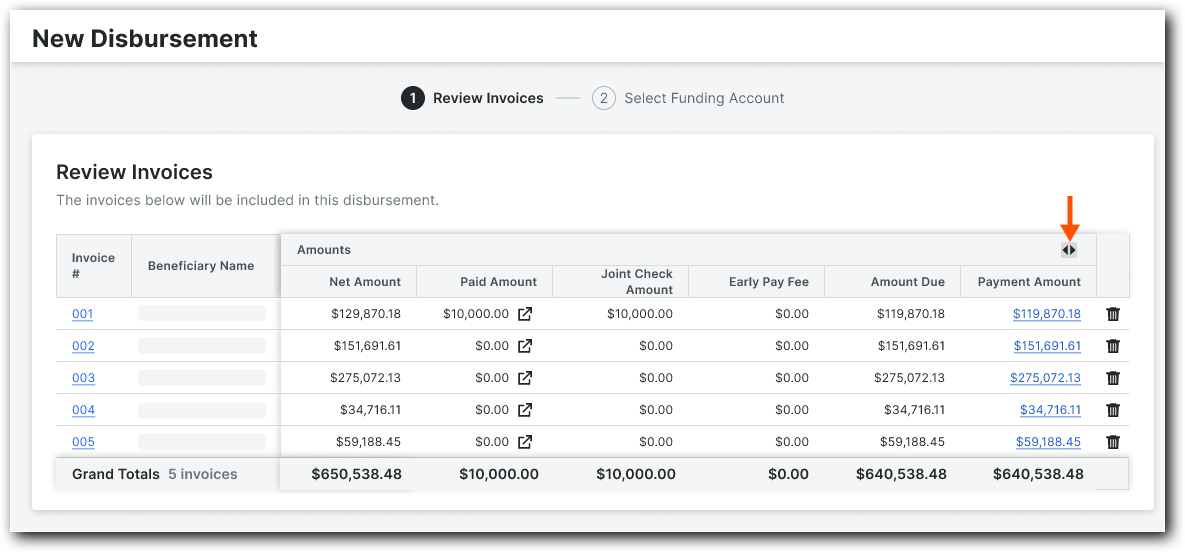
Review Invoices
Navigate to the Company level Payments tool.
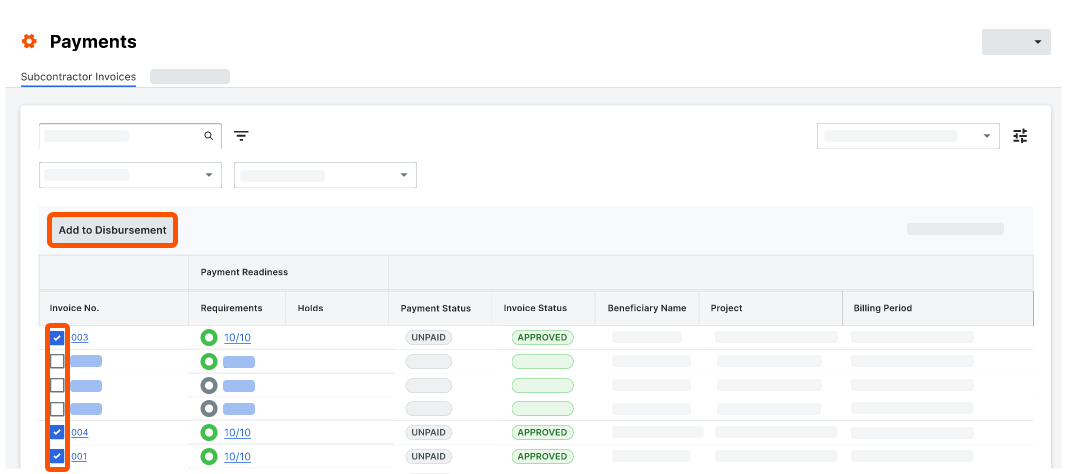
Click the Subcontractor Invoices tab.
Pointe
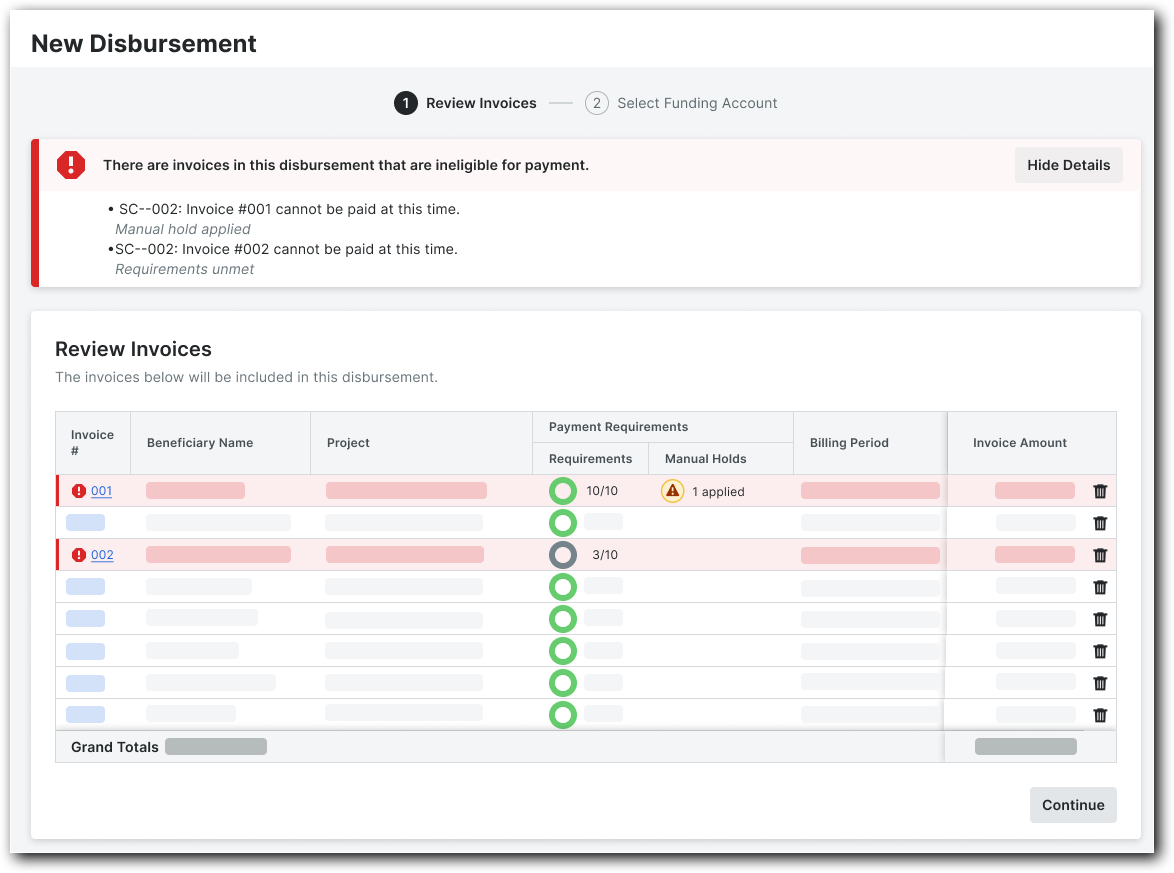
Les factures sont-elles prêtes à être payées ? Suivez ces conseils :
Les factures doivent répondre à toutes les exigences de paiement telles que configurées par un administrateur des paiements dans les paramètres des exigences de paiement. Seuls les utilisateurs autorisés peuvent gérer et afficher les exigences et les retenues de paiement. Voir Gérer les exigences de paiement en tant que payeur et Gérer les retenues de paiement en tant que payeur.
Sous Exigences de paiement, une fraction unitaire dans la colonne Exigences indique si une facture répond aux exigences de paiement et une icône apparaît dans la colonne Suspensions manuelles si une retenue a été appliquée.
Select one (1) or more 'Unpaid' invoice(s) by marking the checkbox(es) and click Add to Disbursement.
Note
S’il y a des décaissements existants avec le statut « Ébauche » :
Pour créer un nouveau décaissement, cliquez sur Créer.
Pour ajouter les décaissements sélectionnés à un « Projet » existant, sélectionnez-le dans le menu. Voir Ajouter des factures de sous-traitants à une ébauche de décaissement.
 This opens the New Disbursement panel on the right side of the page.